Last updated: May 15, 2026 · App version: 1.0.1.17
- Install Bexbox on your phone
- Sign in for the first time
- Find your way around the app
- Add your first contact
- Log your first transaction
- Attach a receipt, photo, or signature
- Fix or remove a transaction
- Read the reports
- Invite a contact to share a ledger
- Use the IOU calculators
- Change your currency
- Lock the app with PIN or fingerprint
- Back up and export your data
- Upgrade your storage
- Delete your account
- Get help
1. Install Bexbox on your phone
Bexbox runs on Android phones. You install it from the Google Play Store, the same way you install any other app. There is no separate download from a website.
- On your phone, open the Play Store app.
- Type Bexbox in the search bar at the top.
- Tap Install. It is about the size of a typical app and downloads in under a minute on Wi-Fi.
- When the install is done, tap Open.
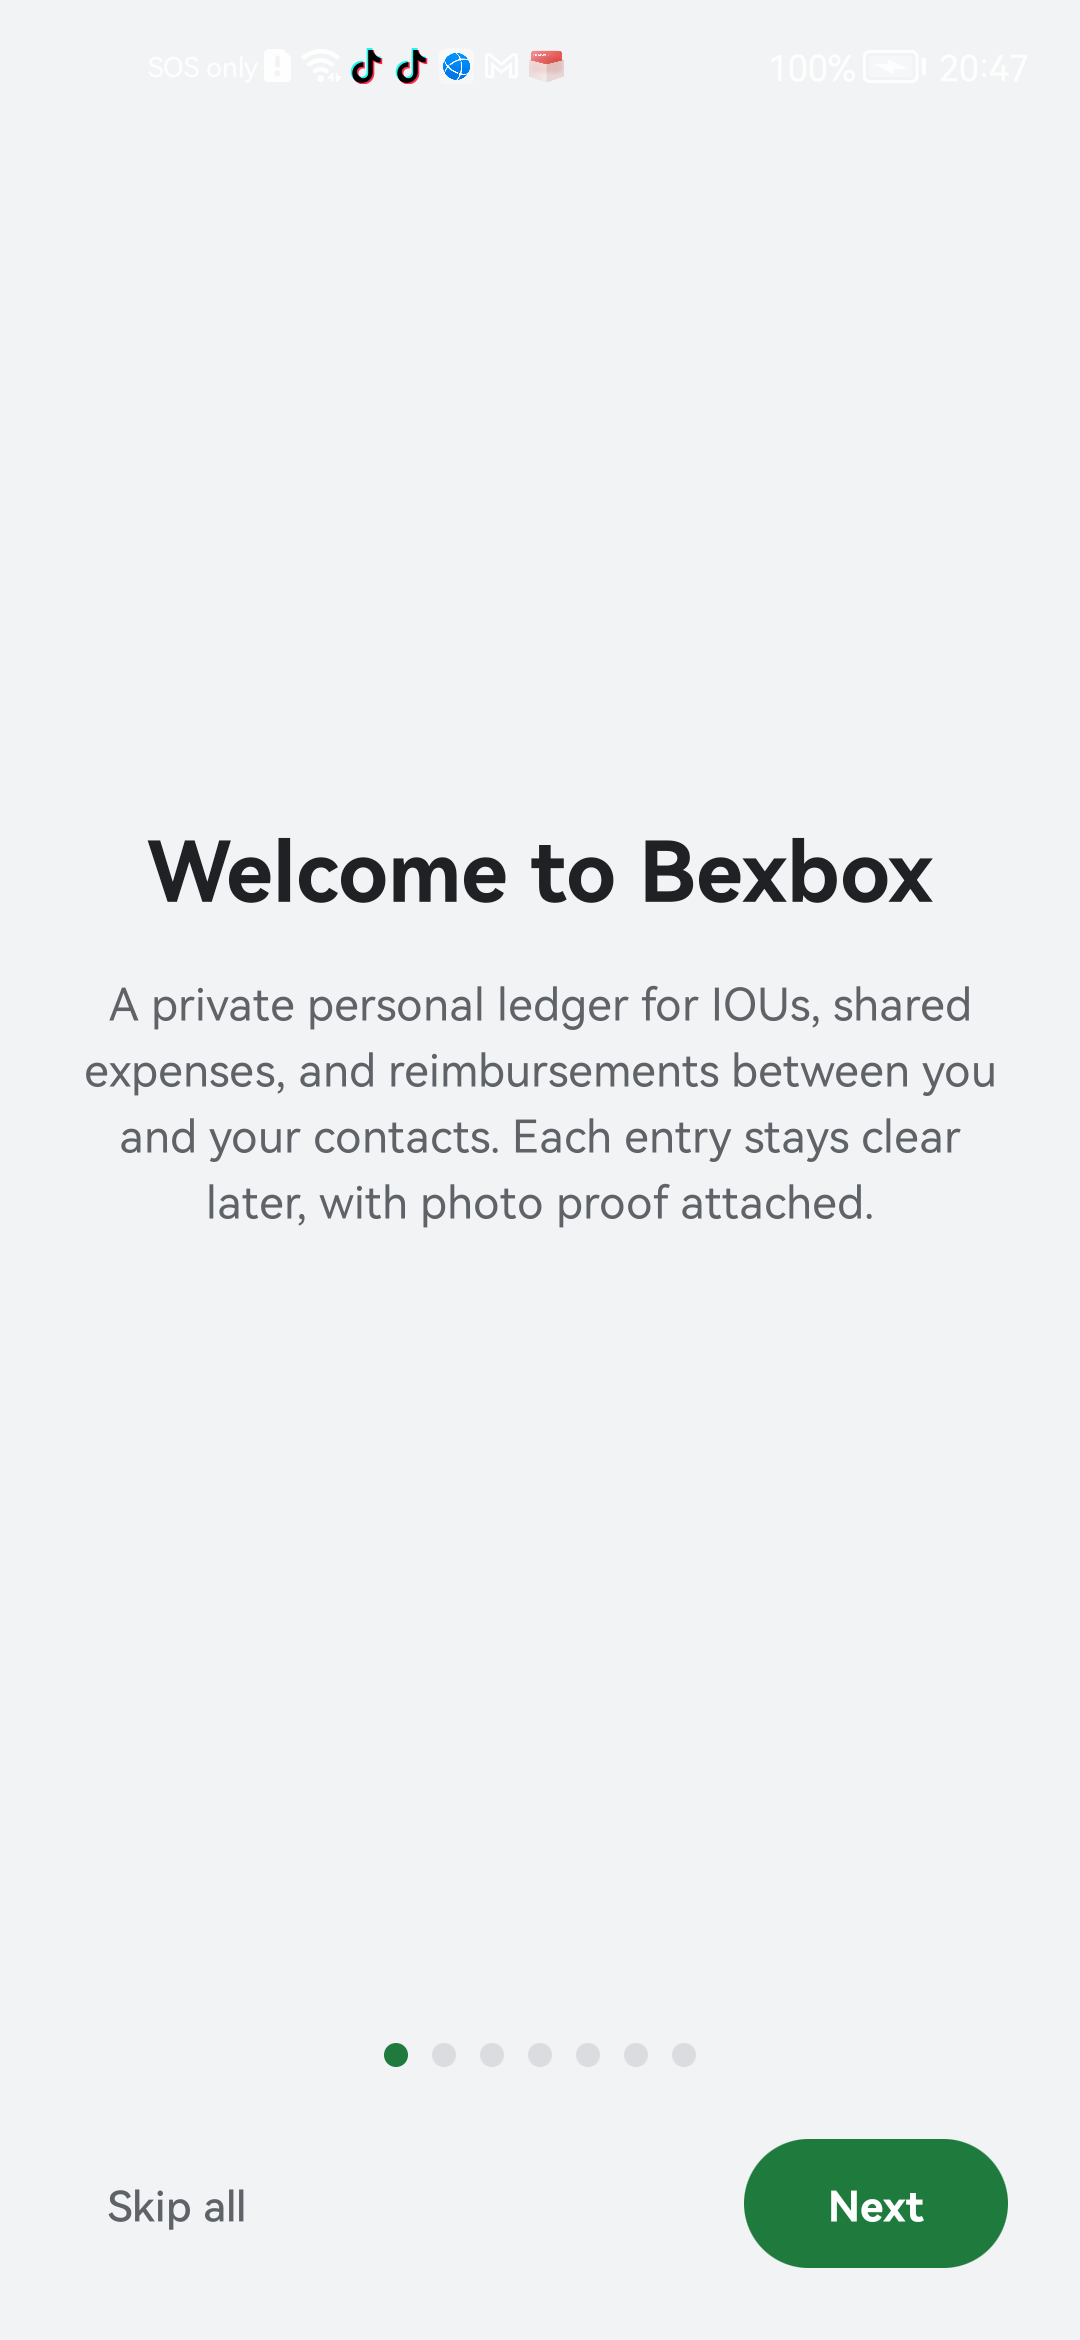
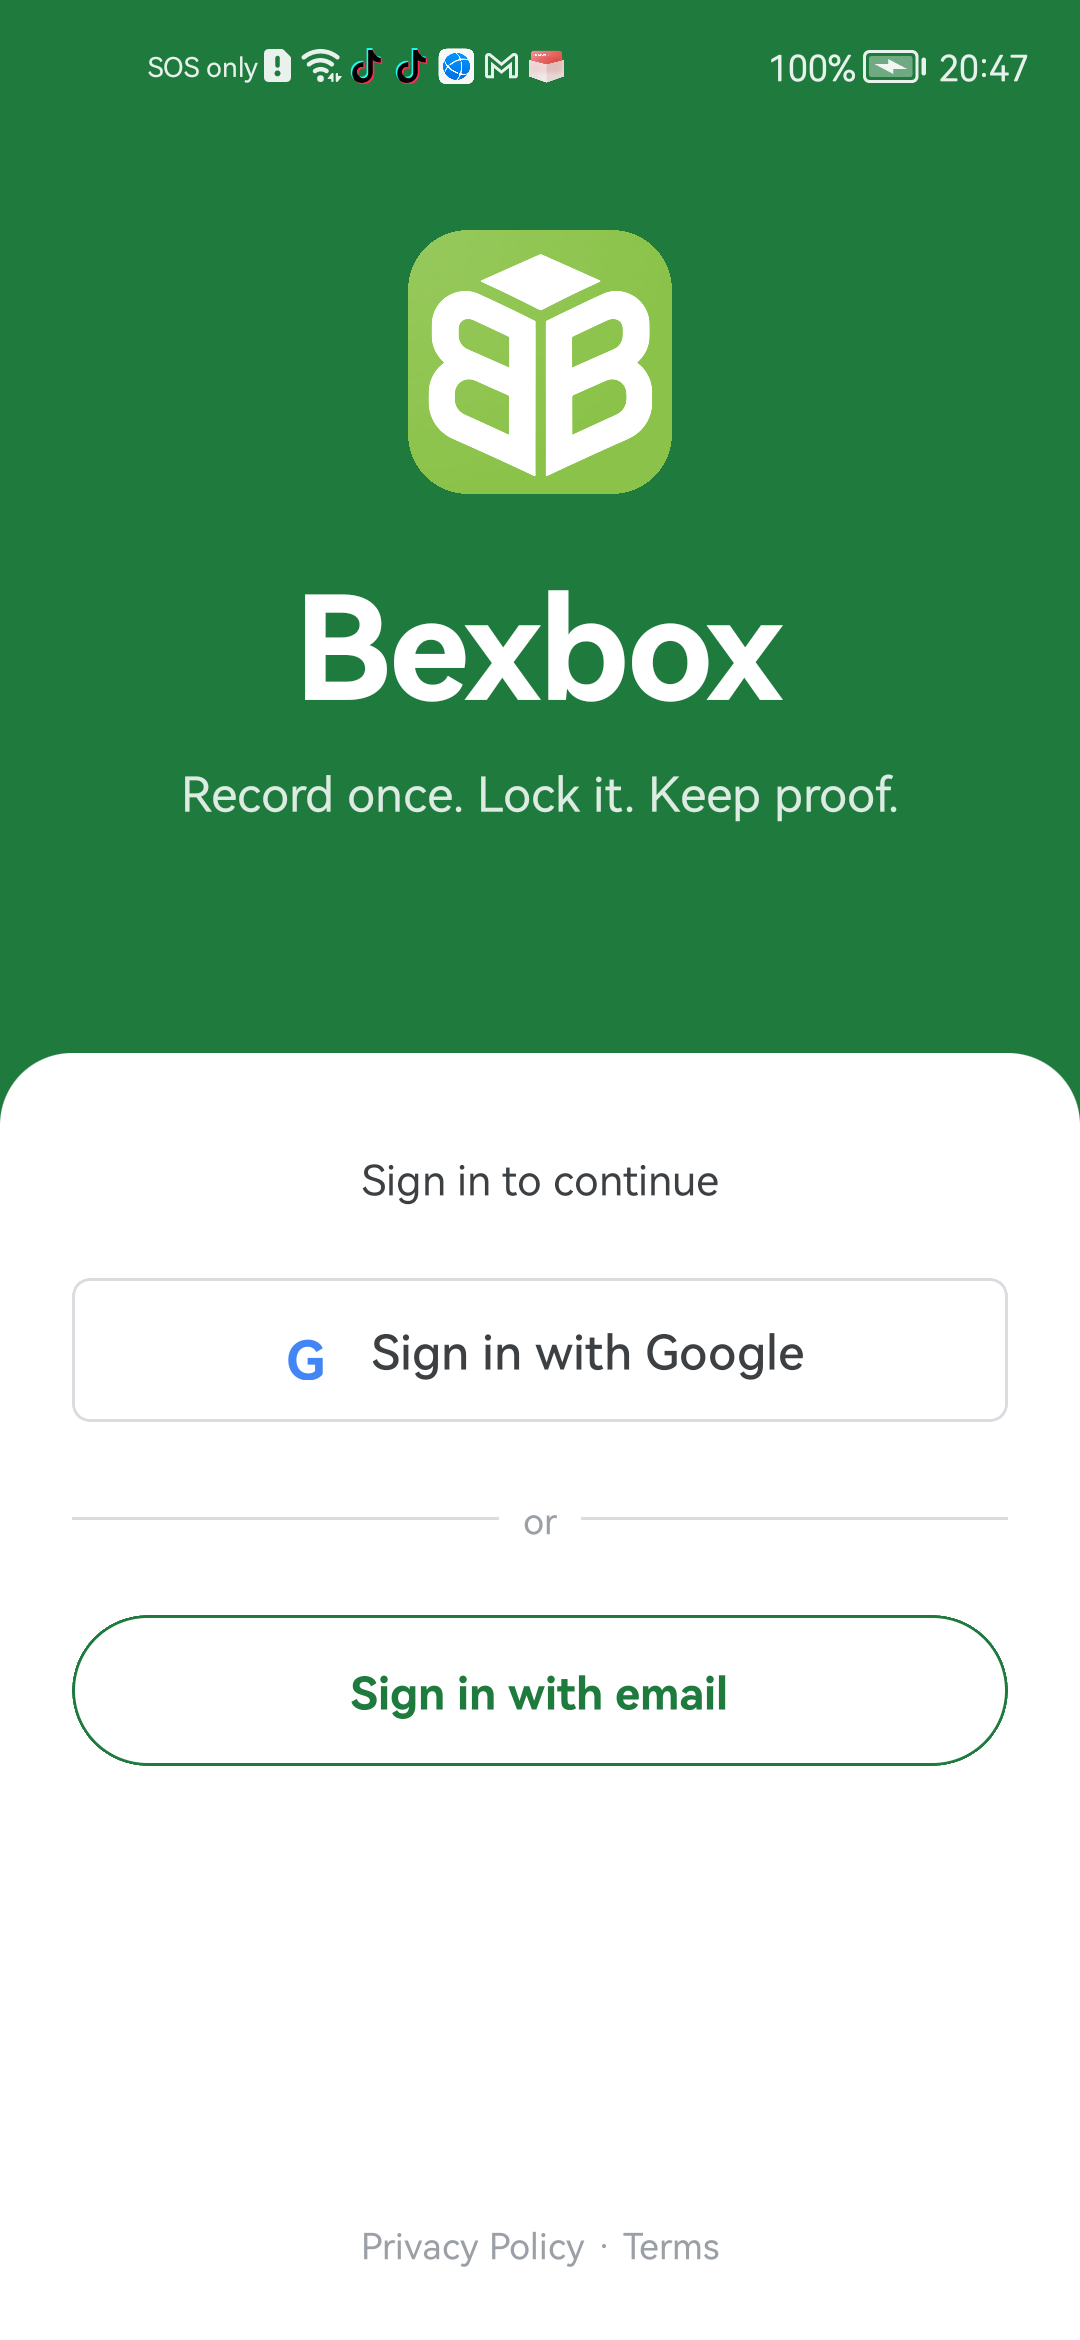
2. Sign in for the first time
The first time you open Bexbox you see a short welcome tour. You can flick through it or tap Skip all at the bottom-left. Either way you land on the sign-in screen.
You have two ways to sign in:
- Sign in with Google: fastest. Pick an account, done.
- Sign in with email: type your email, get a six-digit code, type the code.
Whichever you pick, that account is the owner of every record you create. Use one you will remember and keep access to.
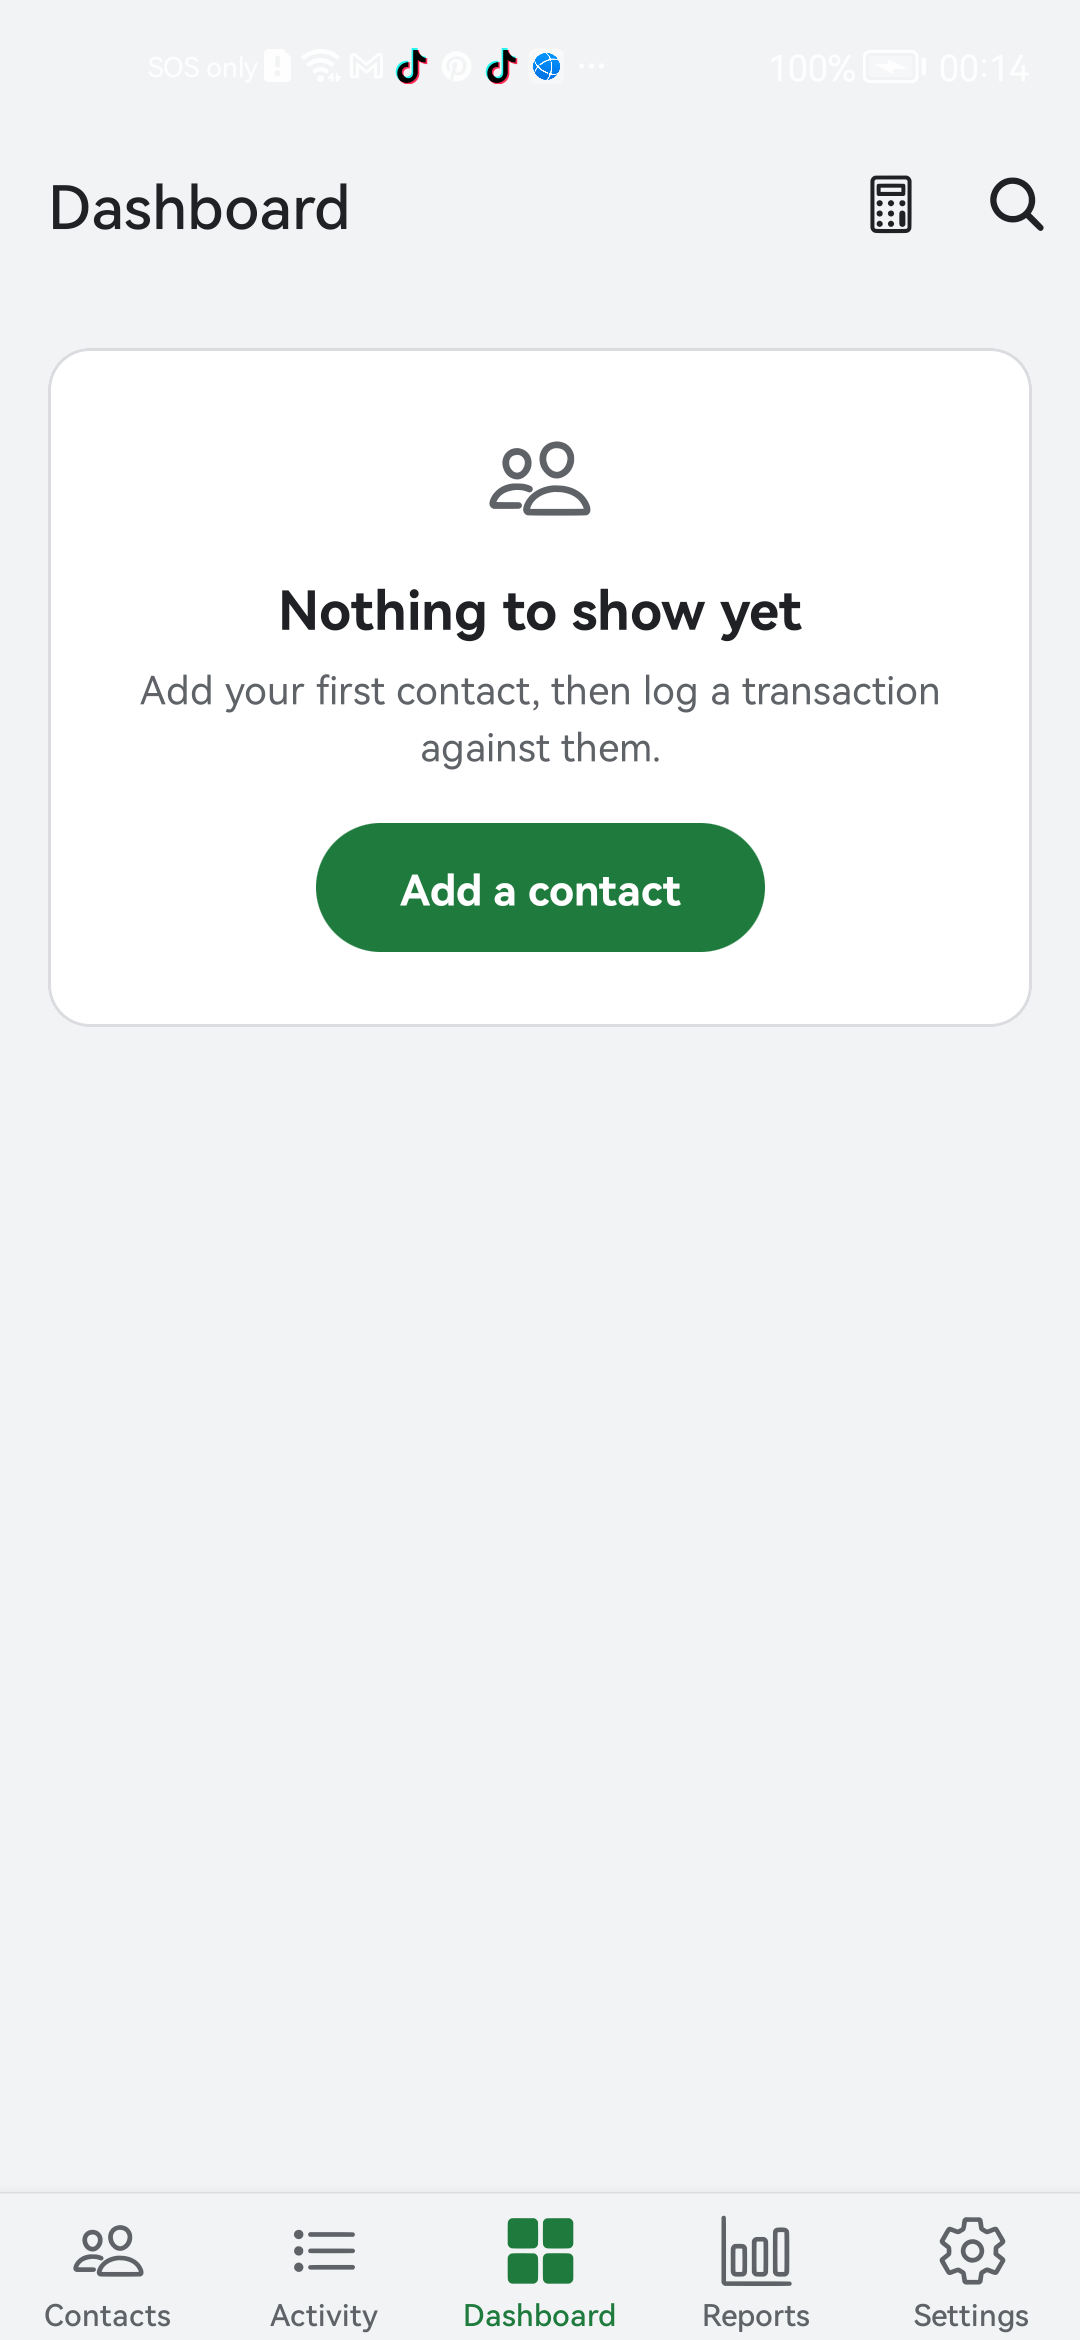
3. Find your way around the app
After you sign in, the app drops you on the Dashboard. The Dashboard is your one-glance summary: how much people owe you, how much you owe other people, and the recent activity.
At the bottom of every screen there is a row of small icons. These are the tabs. From left to right they take you to:
- Contacts: the people you log money with.
- Activity: every entry you have ever made, in date order.
- Dashboard: the summary you are looking at right now. This is the middle tab.
- Reports: charts and totals.
- Settings: currency, account, app lock, export, plan.
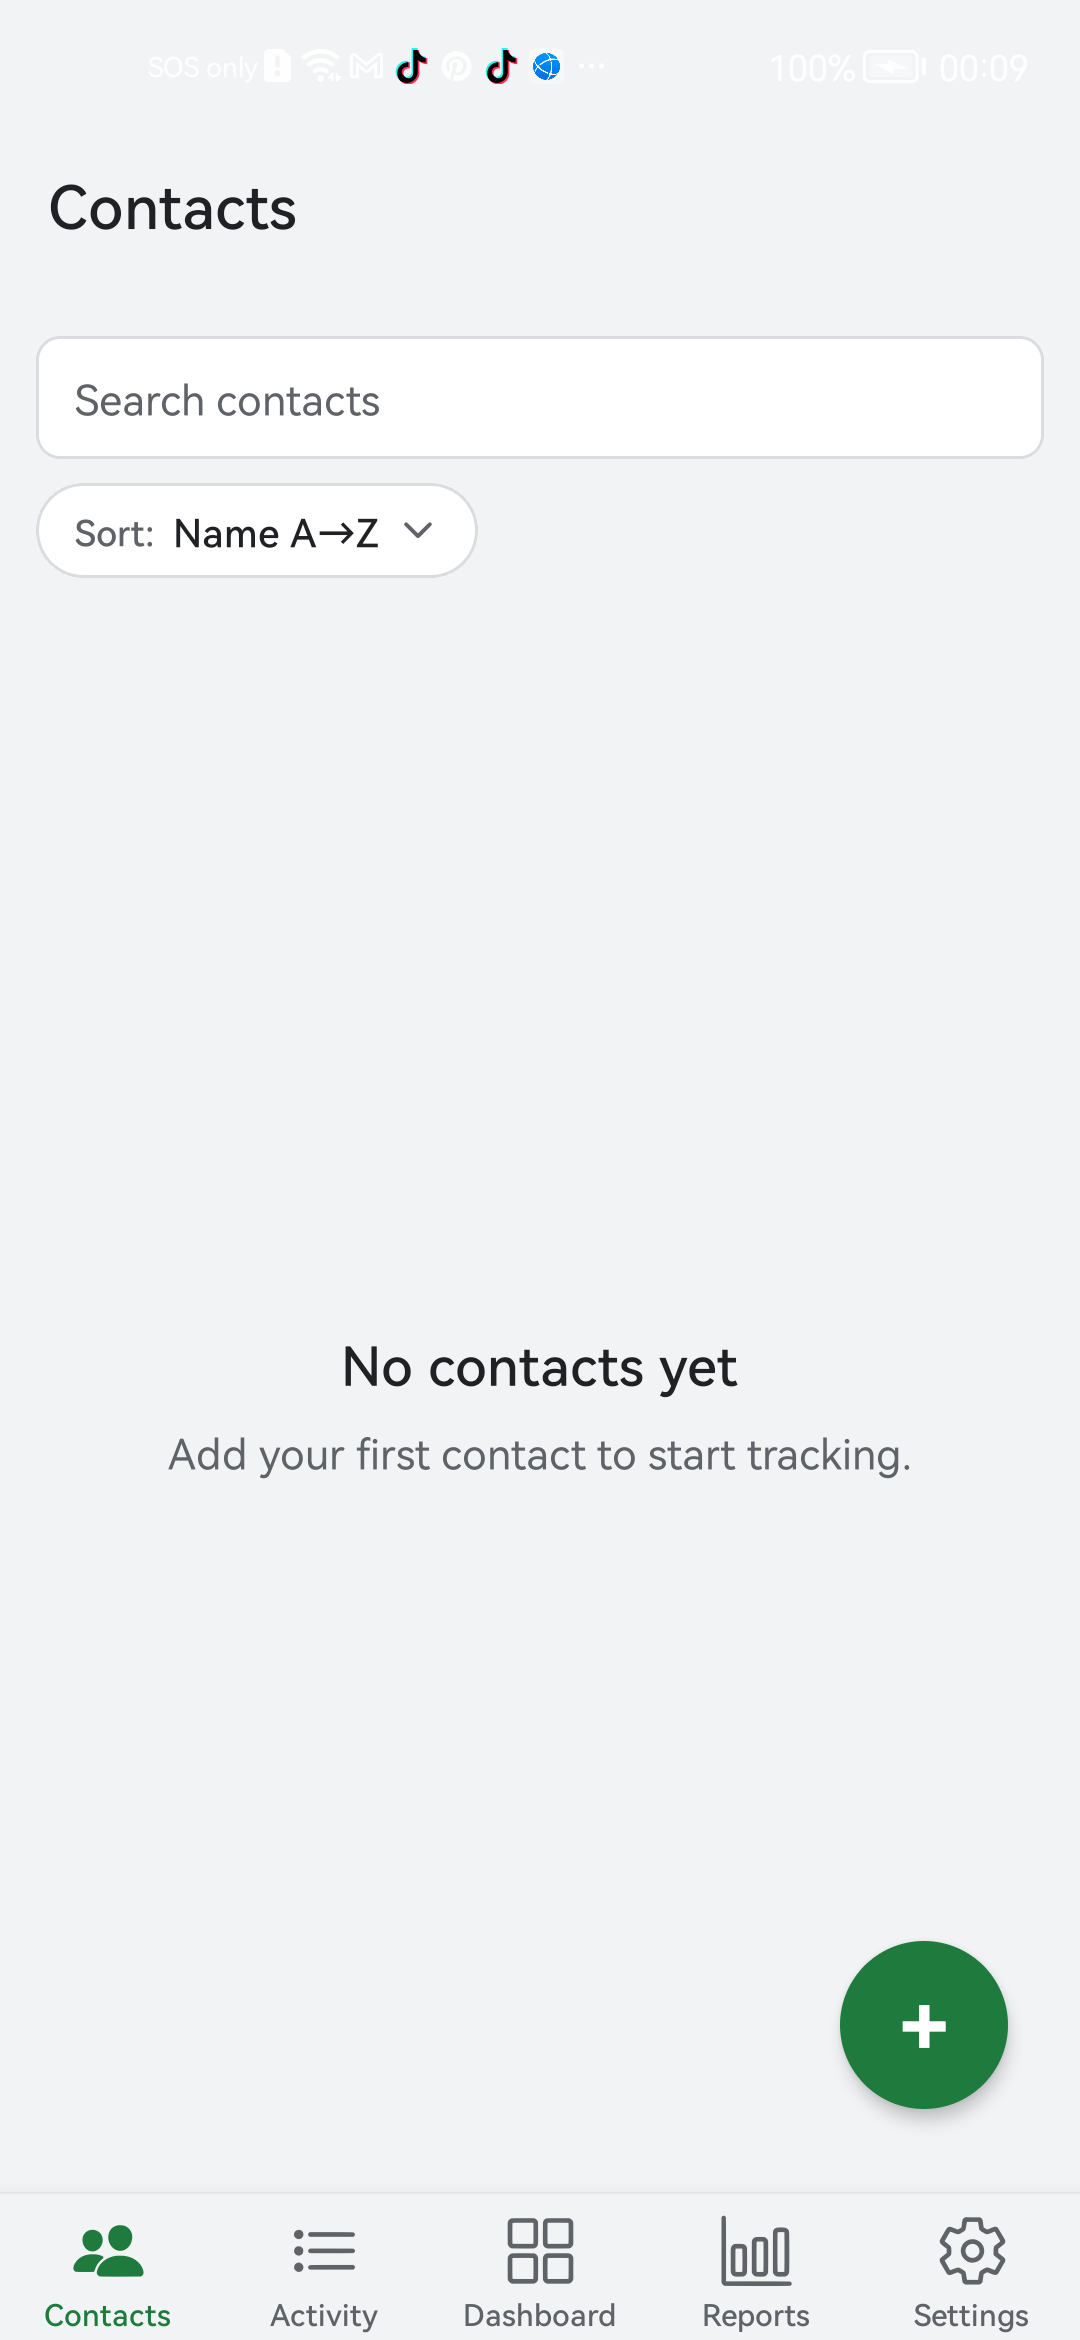
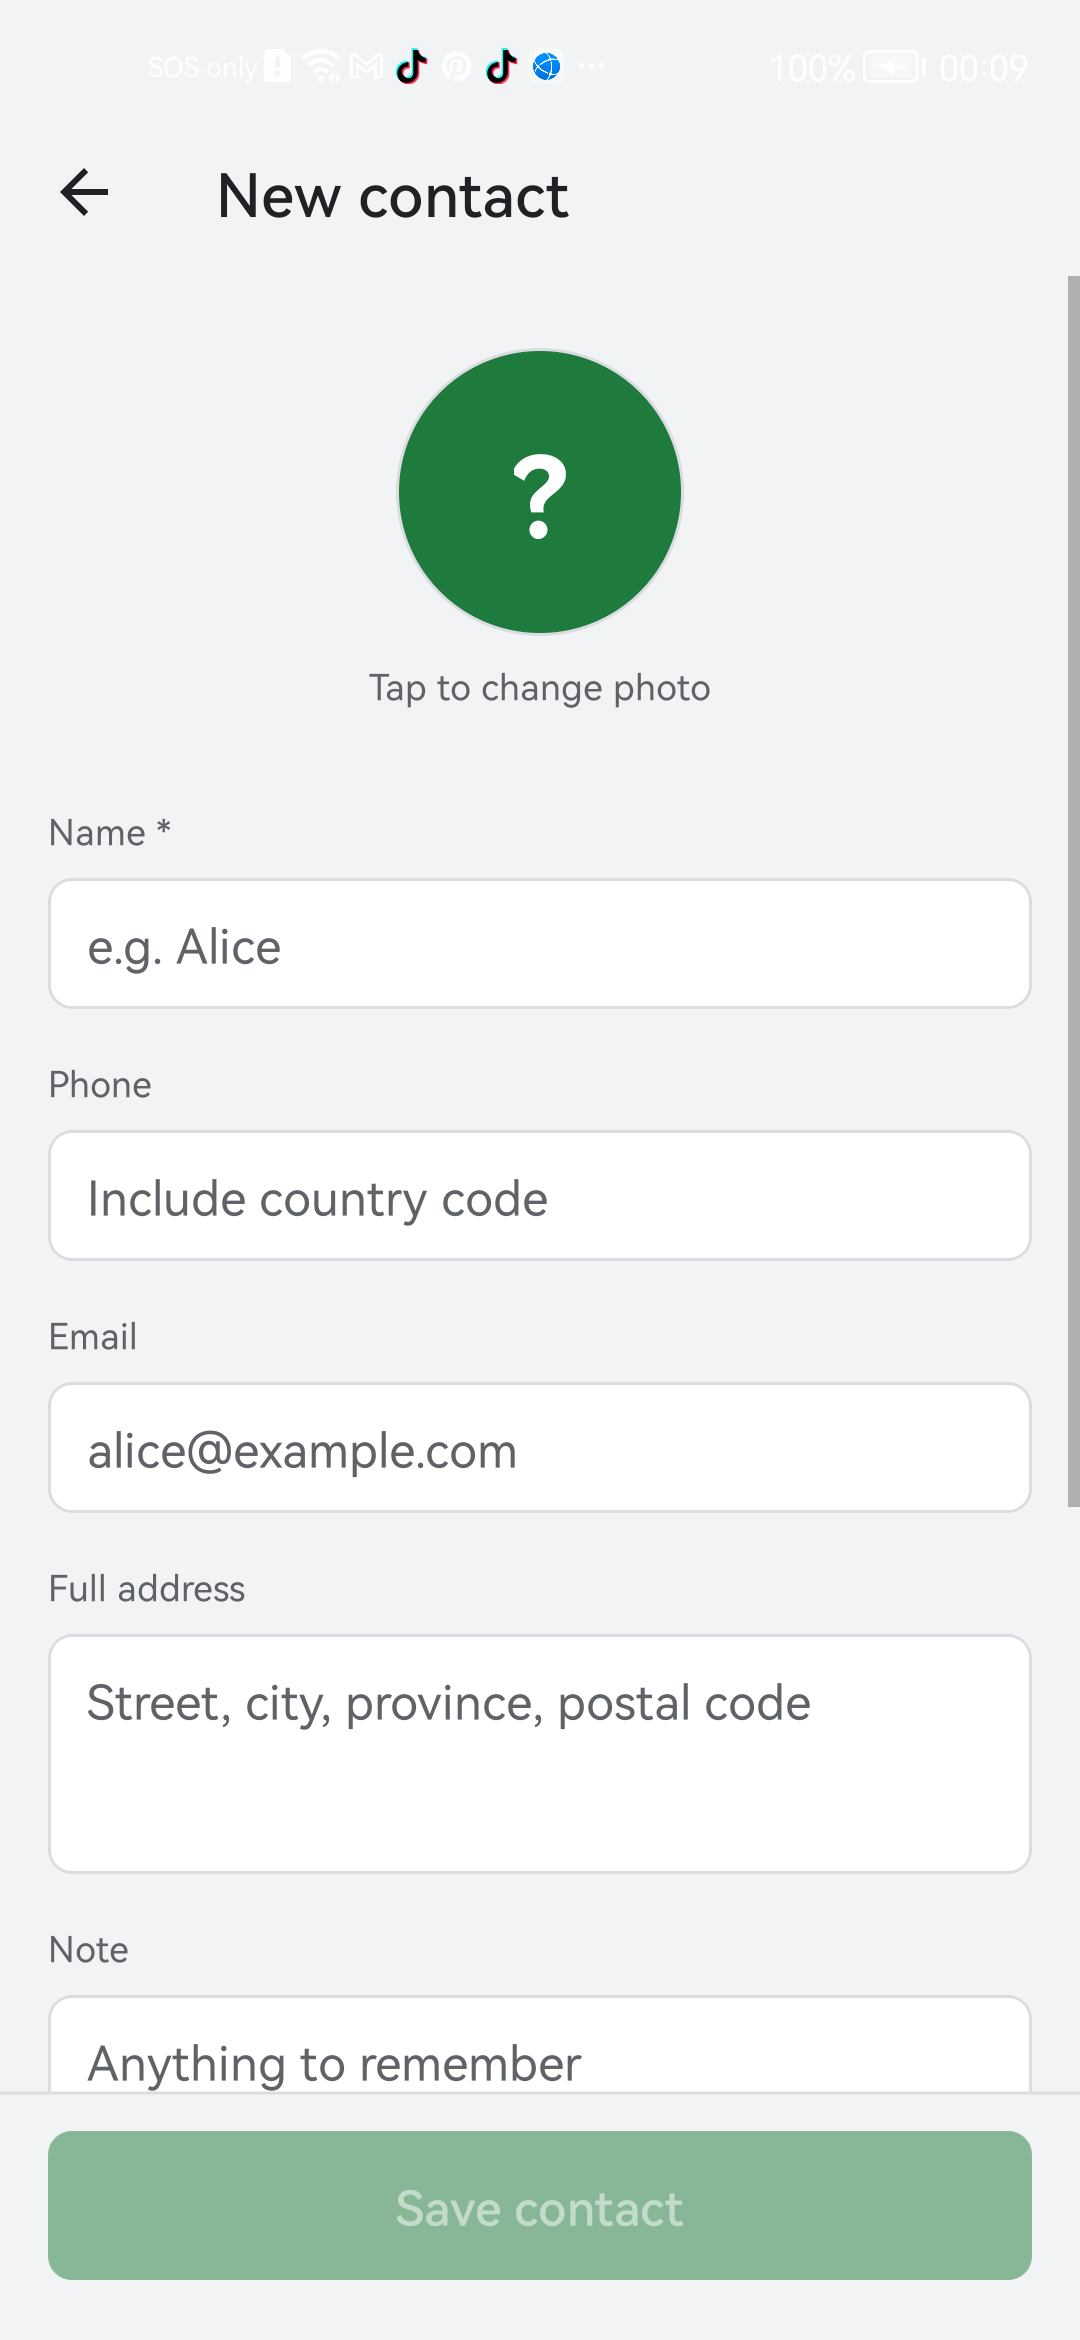
4. Add your first contact
In Bexbox, every transaction is attached to a contact. A contact is just a person you exchange money with: a friend, a family member, a roommate, a customer.
You do not need their phone number or email. A name is enough.
- Tap the Contacts tab (leftmost icon at the bottom).
- Tap the + button. On most phones it is a green circle in the bottom-right corner.
- Type the contact's name. That is the only required field.
- (Optional) Add a phone number or a photo. Useful but not needed.
- Tap Save.
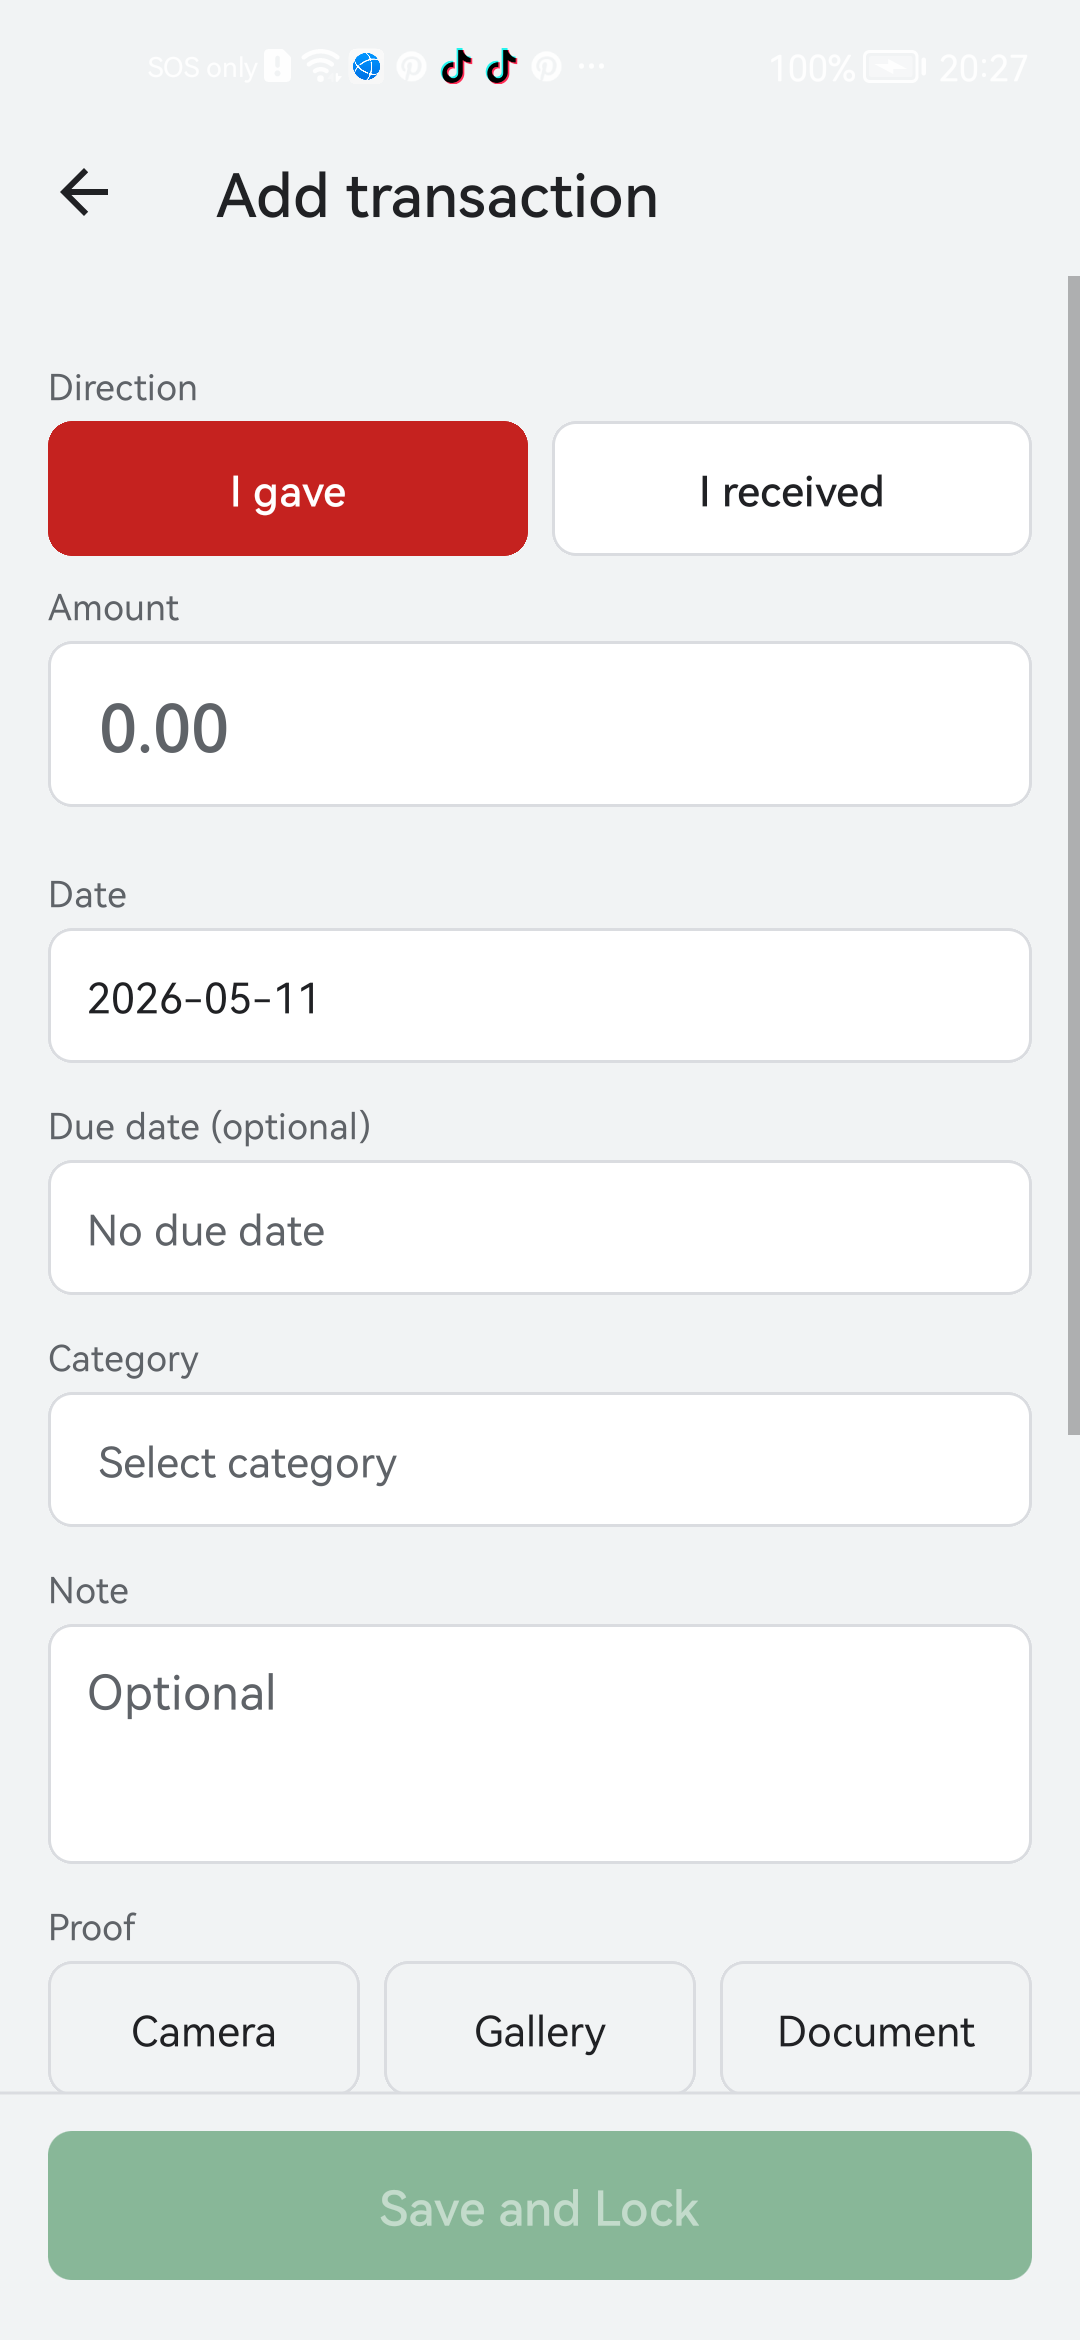
5. Log your first transaction
A transaction is one entry that records money moving in or out. "I covered Maria's $25 lunch" is a transaction. "Maria paid me back $10" is another transaction.
- Tap the contact you want to log a transaction for. This opens the contact's screen, where their running balance lives.
- Tap the + button to add a new transaction.
- Choose I gave (you paid for them or lent them money) or I received (they paid you back, or owed you and now do not).
- Type the amount, for example 25.00.
- Set the date. You can also add an optional due date to get a reminder later.
- Pick a category like Food, Rent, Utilities. Picking a category helps the reports later.
- (Optional) Add a note and any proof attachments (covered in the next section).
- Tap Save and Lock.

6. Attach a receipt, photo, or signature
Bexbox is built around proof. Every transaction can carry photos, PDFs, and supporting documents. This is what makes the record defensible: months from now, you can point at the actual receipt instead of relying on memory.
On the Add transaction form, scroll down to the Proof section. You will see three buttons:
- Camera: take a photo of the receipt right now.
- Gallery: pick a photo from your phone's gallery.
- Document: pick a PDF or other file from your phone's storage. Good for emailed receipts.
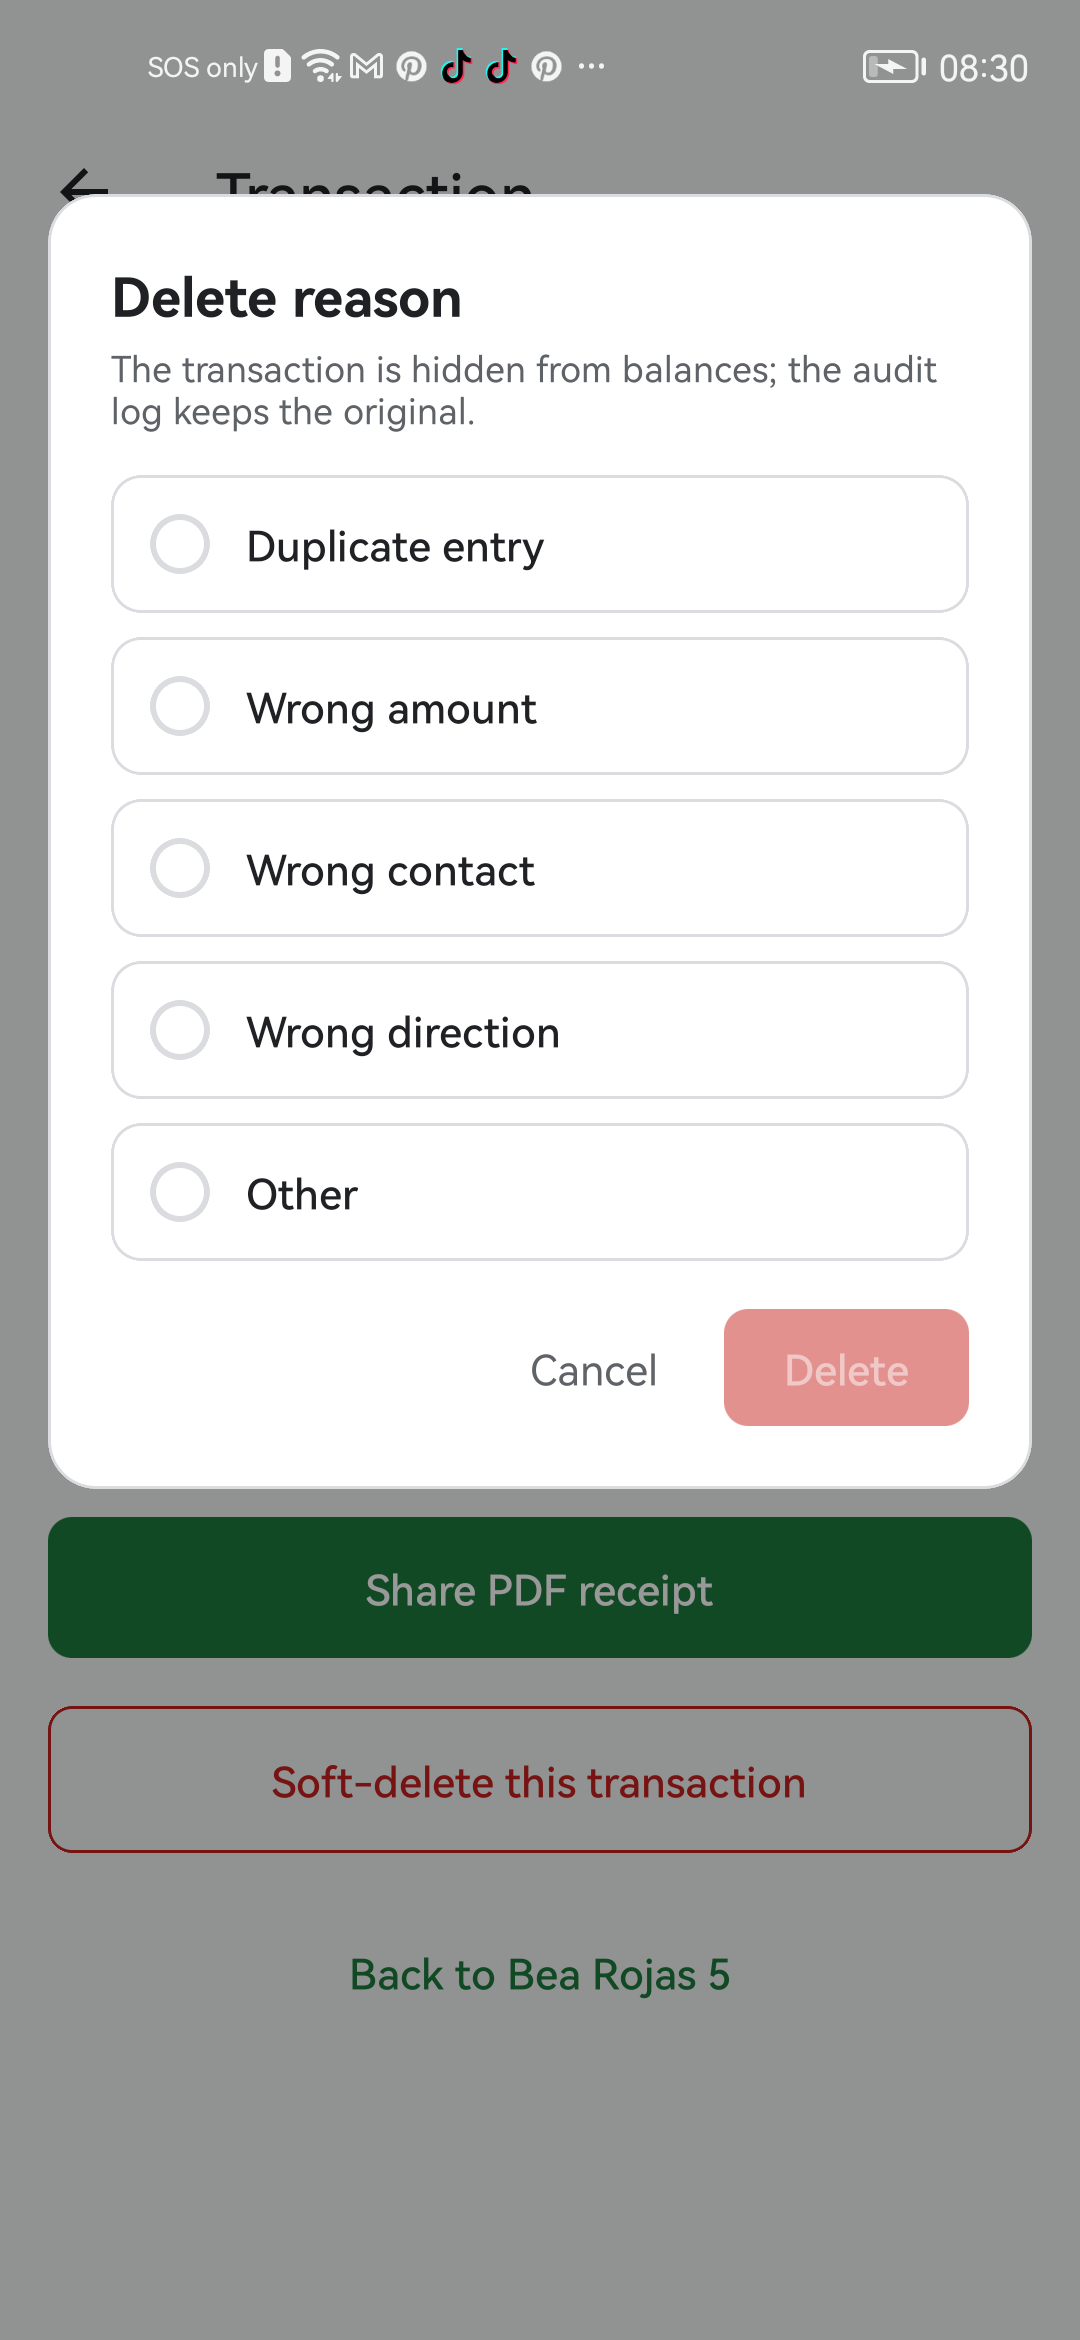
7. Fix or remove a transaction
Transactions are read-only after you save them. That sounds strict, but it is what makes the ledger trustworthy. To fix a mistake, you have two options.
Option A: Add a correcting entry
If you typed $25 instead of $20, add a new transaction in the opposite direction for $5. Now the running balance is right and the history shows what actually happened.
Option B: Soft-delete the transaction
- Open the transaction.
- Tap the menu (three dots), then Delete.
- Bexbox asks you for a reason. Type something honest like "wrong amount" or "duplicate entry".
- Tap Confirm. The transaction drops out of the balance but stays in the audit trail and in your full ZIP export.
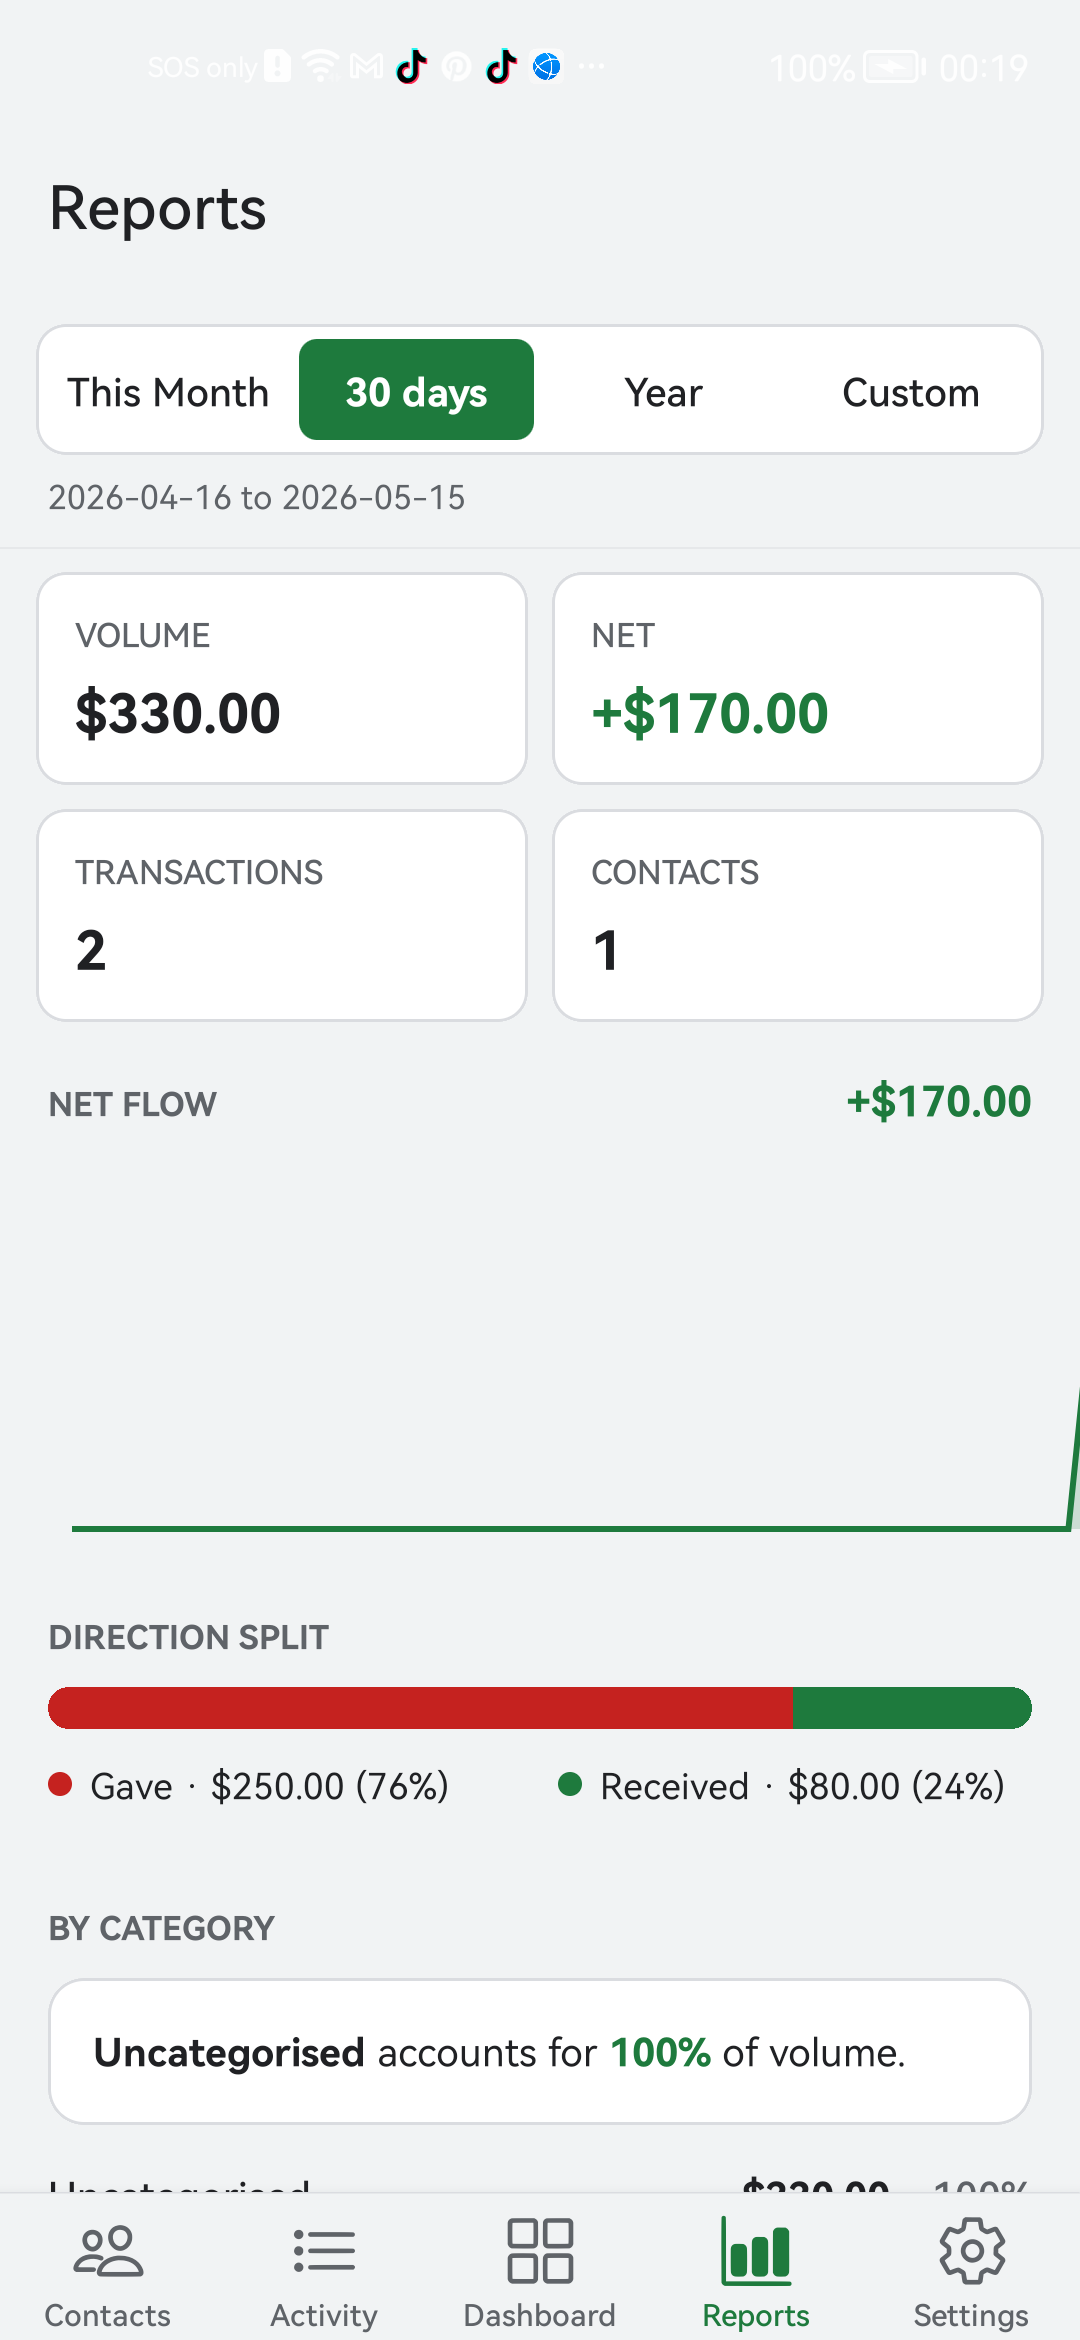
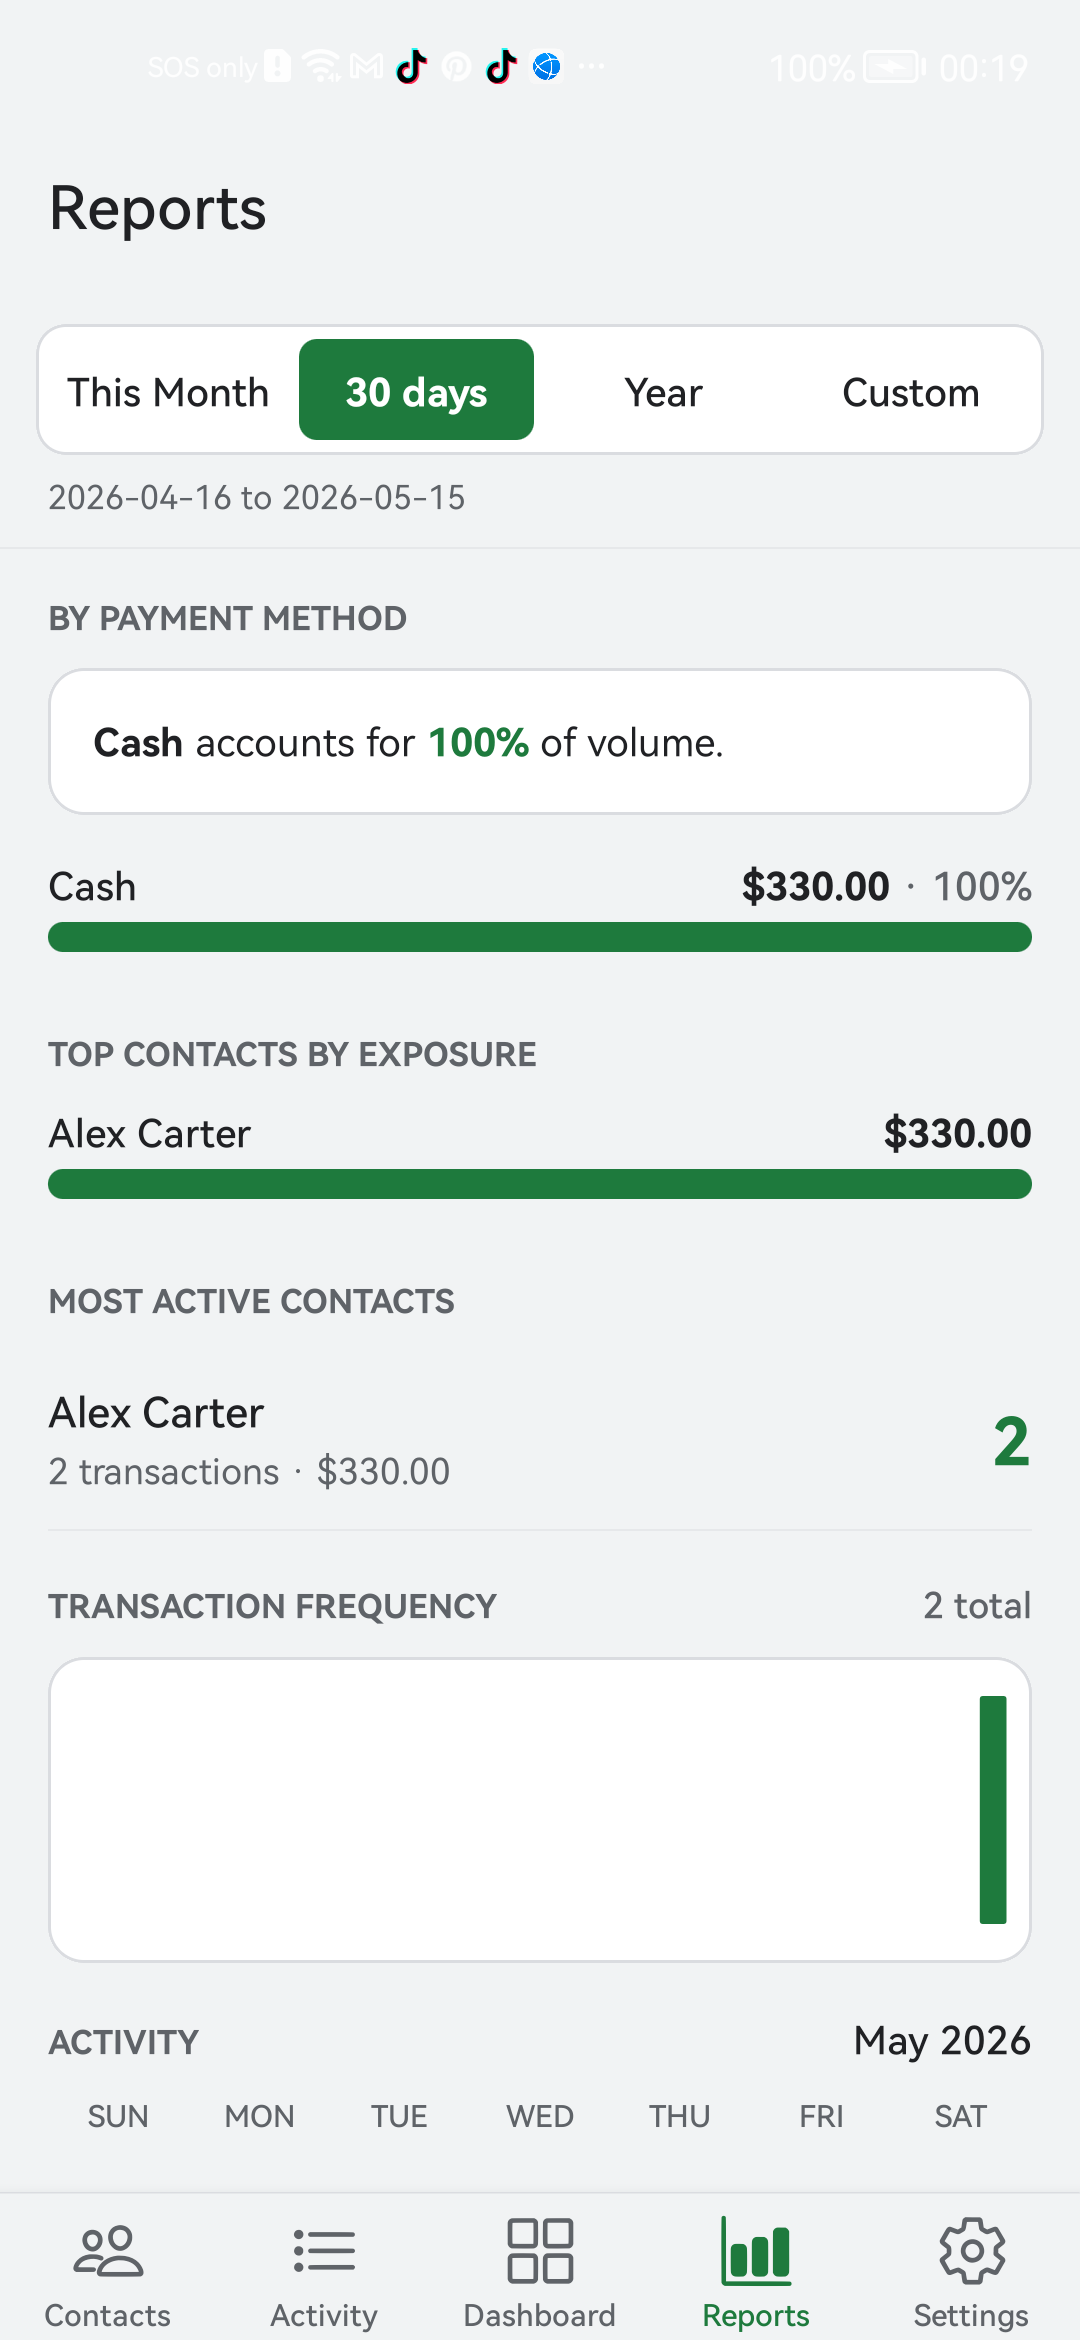
8. Read the reports
Tap the Reports tab. You will see a few cards, each one a different angle on your data.
- Volume and Net: total money you put in versus total money you took in, for the selected period.
- Direction Split: percentage of transactions where you gave vs received.
- Aging buckets: how long money has been outstanding. 0 to 30 days is fresh, 90+ days is stale.
- Payment method: Cash vs GCash vs Card vs Bank, by share of your activity.
- Top contacts and Most active contacts: who you transact with most.
- Activity calendar: a heat map of busy days across the month.
At the top of Reports you can switch between This Month, 30 days, Year, or Custom.
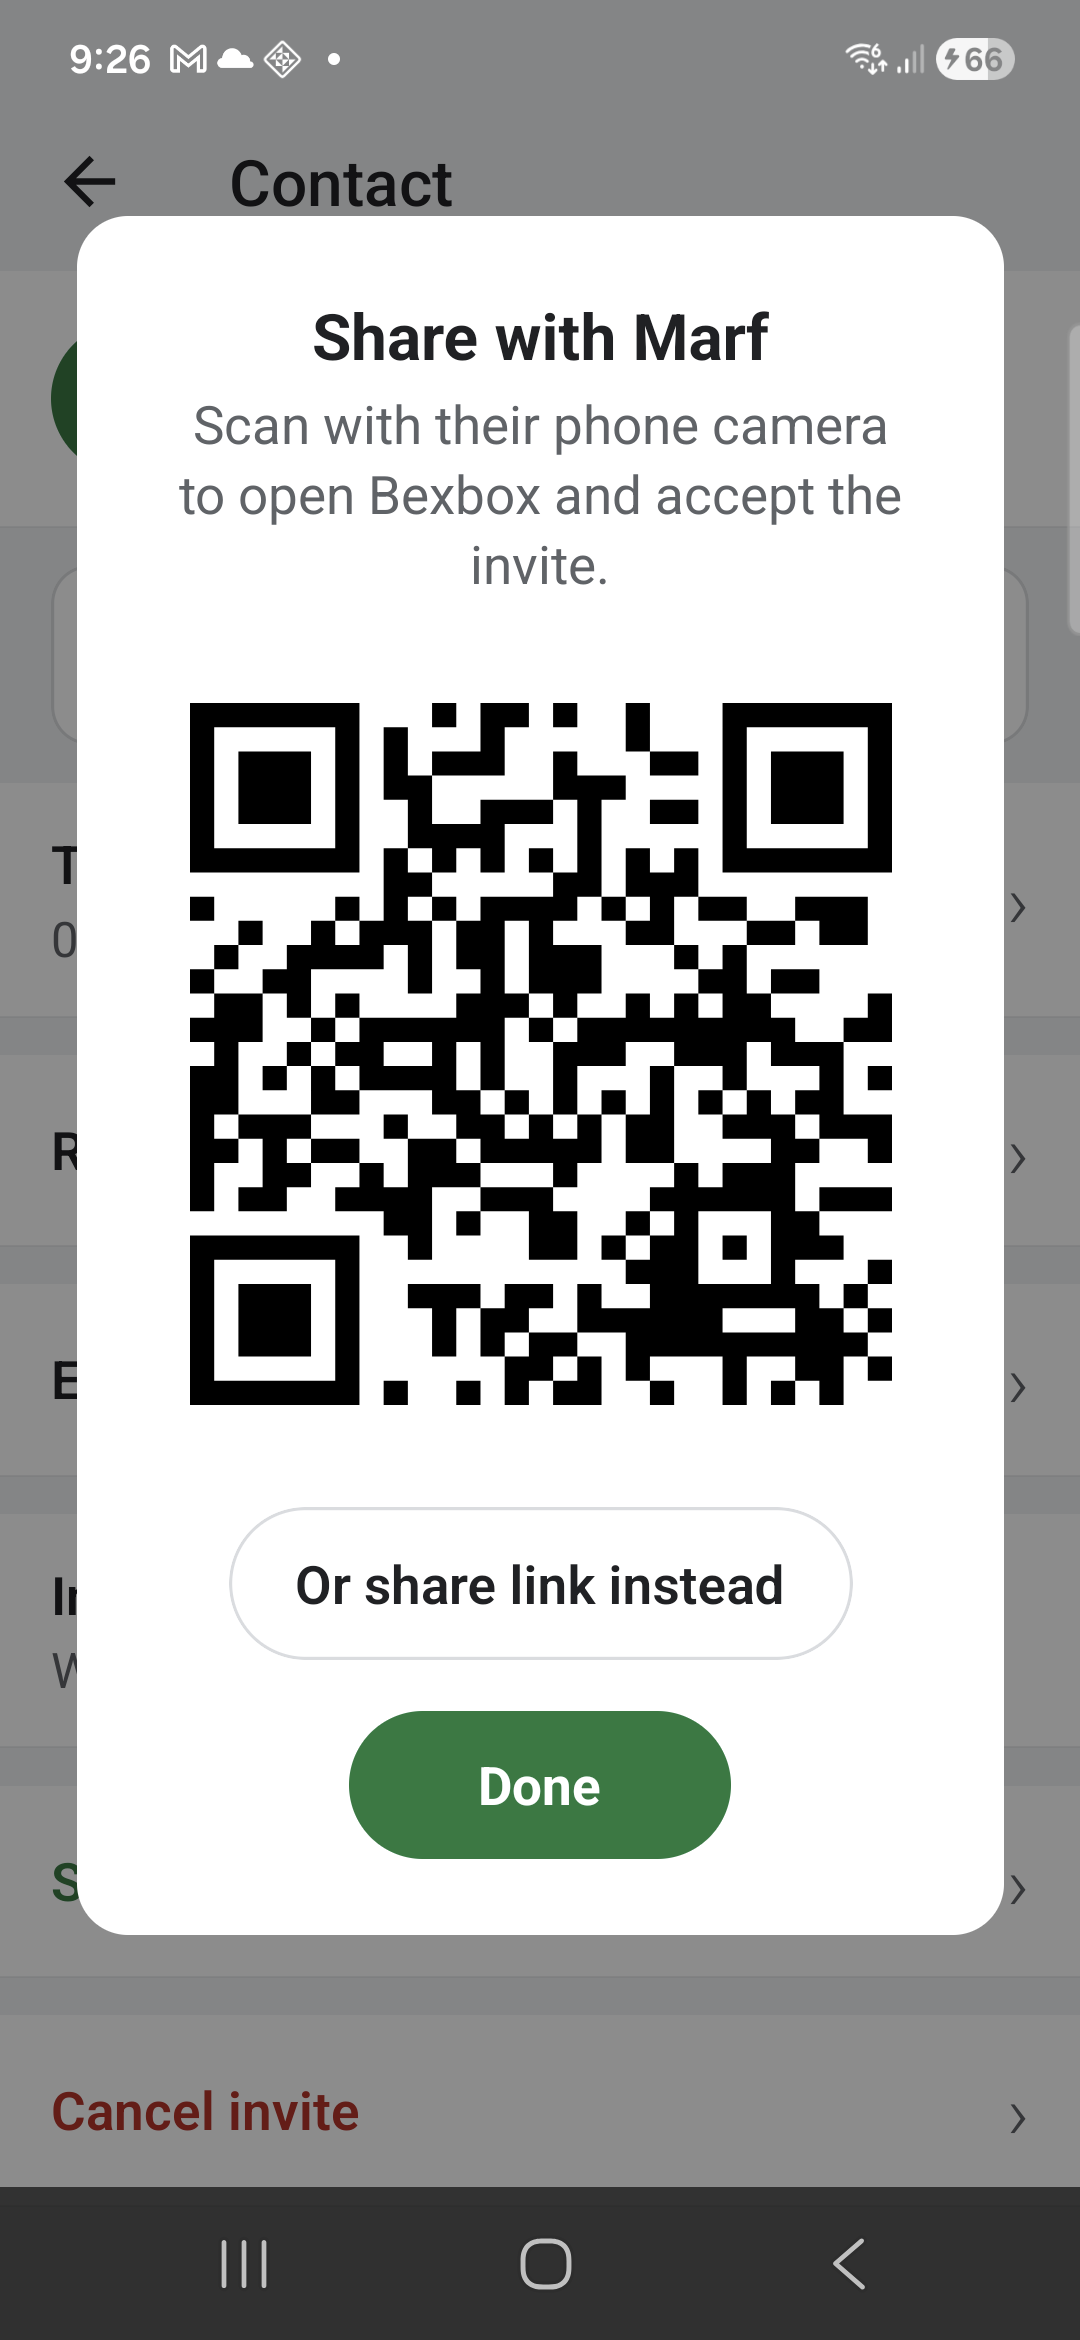
9. Invite a contact to share a ledger
So far the contact has been private. Only you see it. You can also send the other person an invite to join, so they can see the ledger from their side.
- Open the contact you want to share with.
- Tap Invite to share for a sharable link, or Show QR code for an in-person invite.
- Send the link on WhatsApp, Messenger, SMS, or email; or have the other person scan the QR code with their phone.
- The other person opens the link or scans the code, signs in to Bexbox if they are not already, and taps Accept.
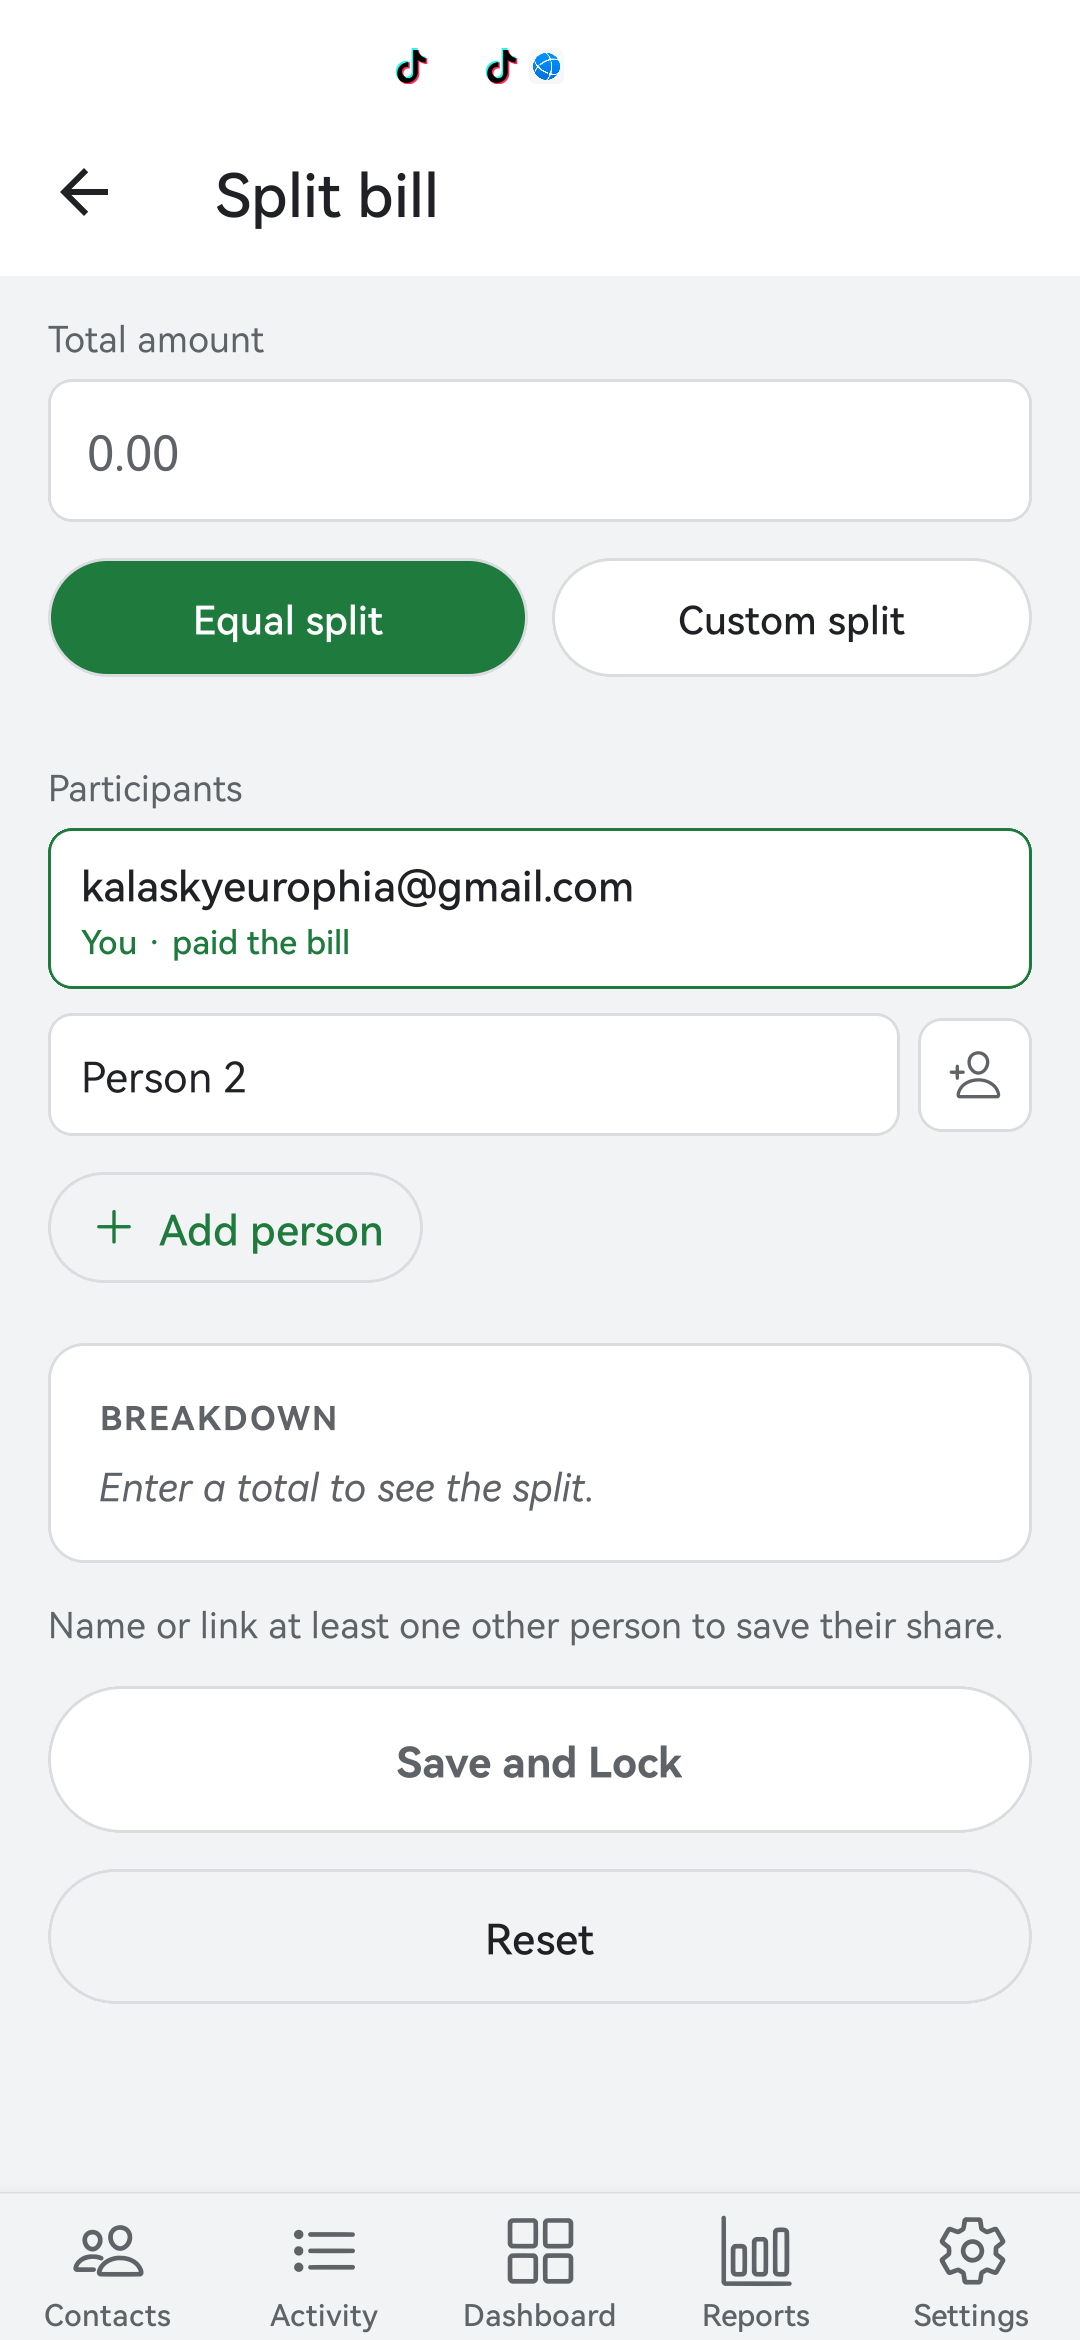
10. Use the IOU calculators
The IOU Tools tab has four small calculators. None of them save anything by themselves. You can copy the result into a real transaction on a contact when you are happy with it.
Split Bill
You paid the whole bill. Split it evenly across two or more people, or by share if some people ordered more.
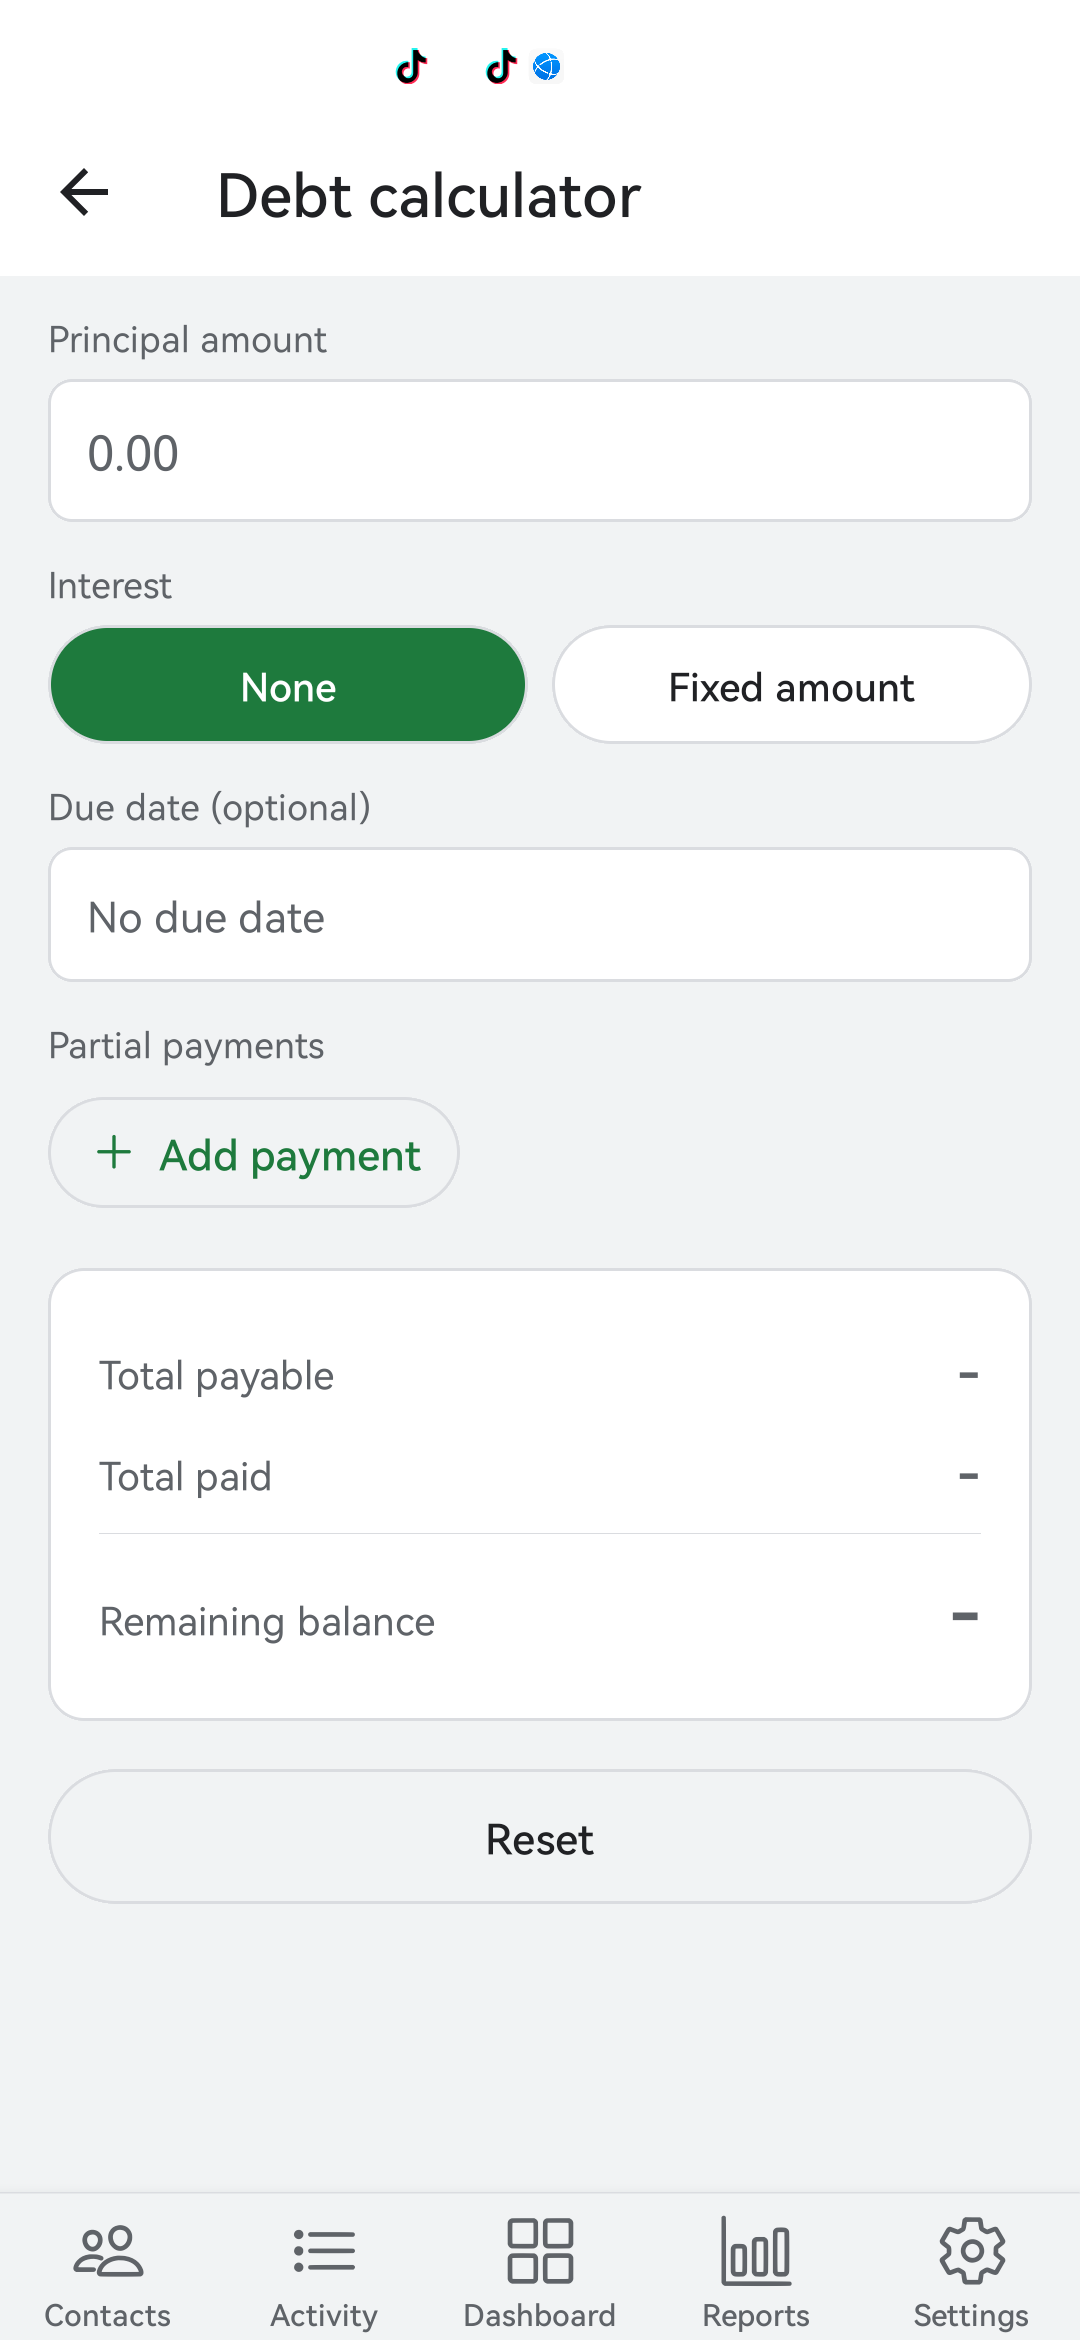
Debt
Plan how a debt gets paid off. Type the principal, set the interest (None or Fixed), pick a due date, and log partial payments. The calculator shows total payable, total paid, and the remaining balance at a glance.
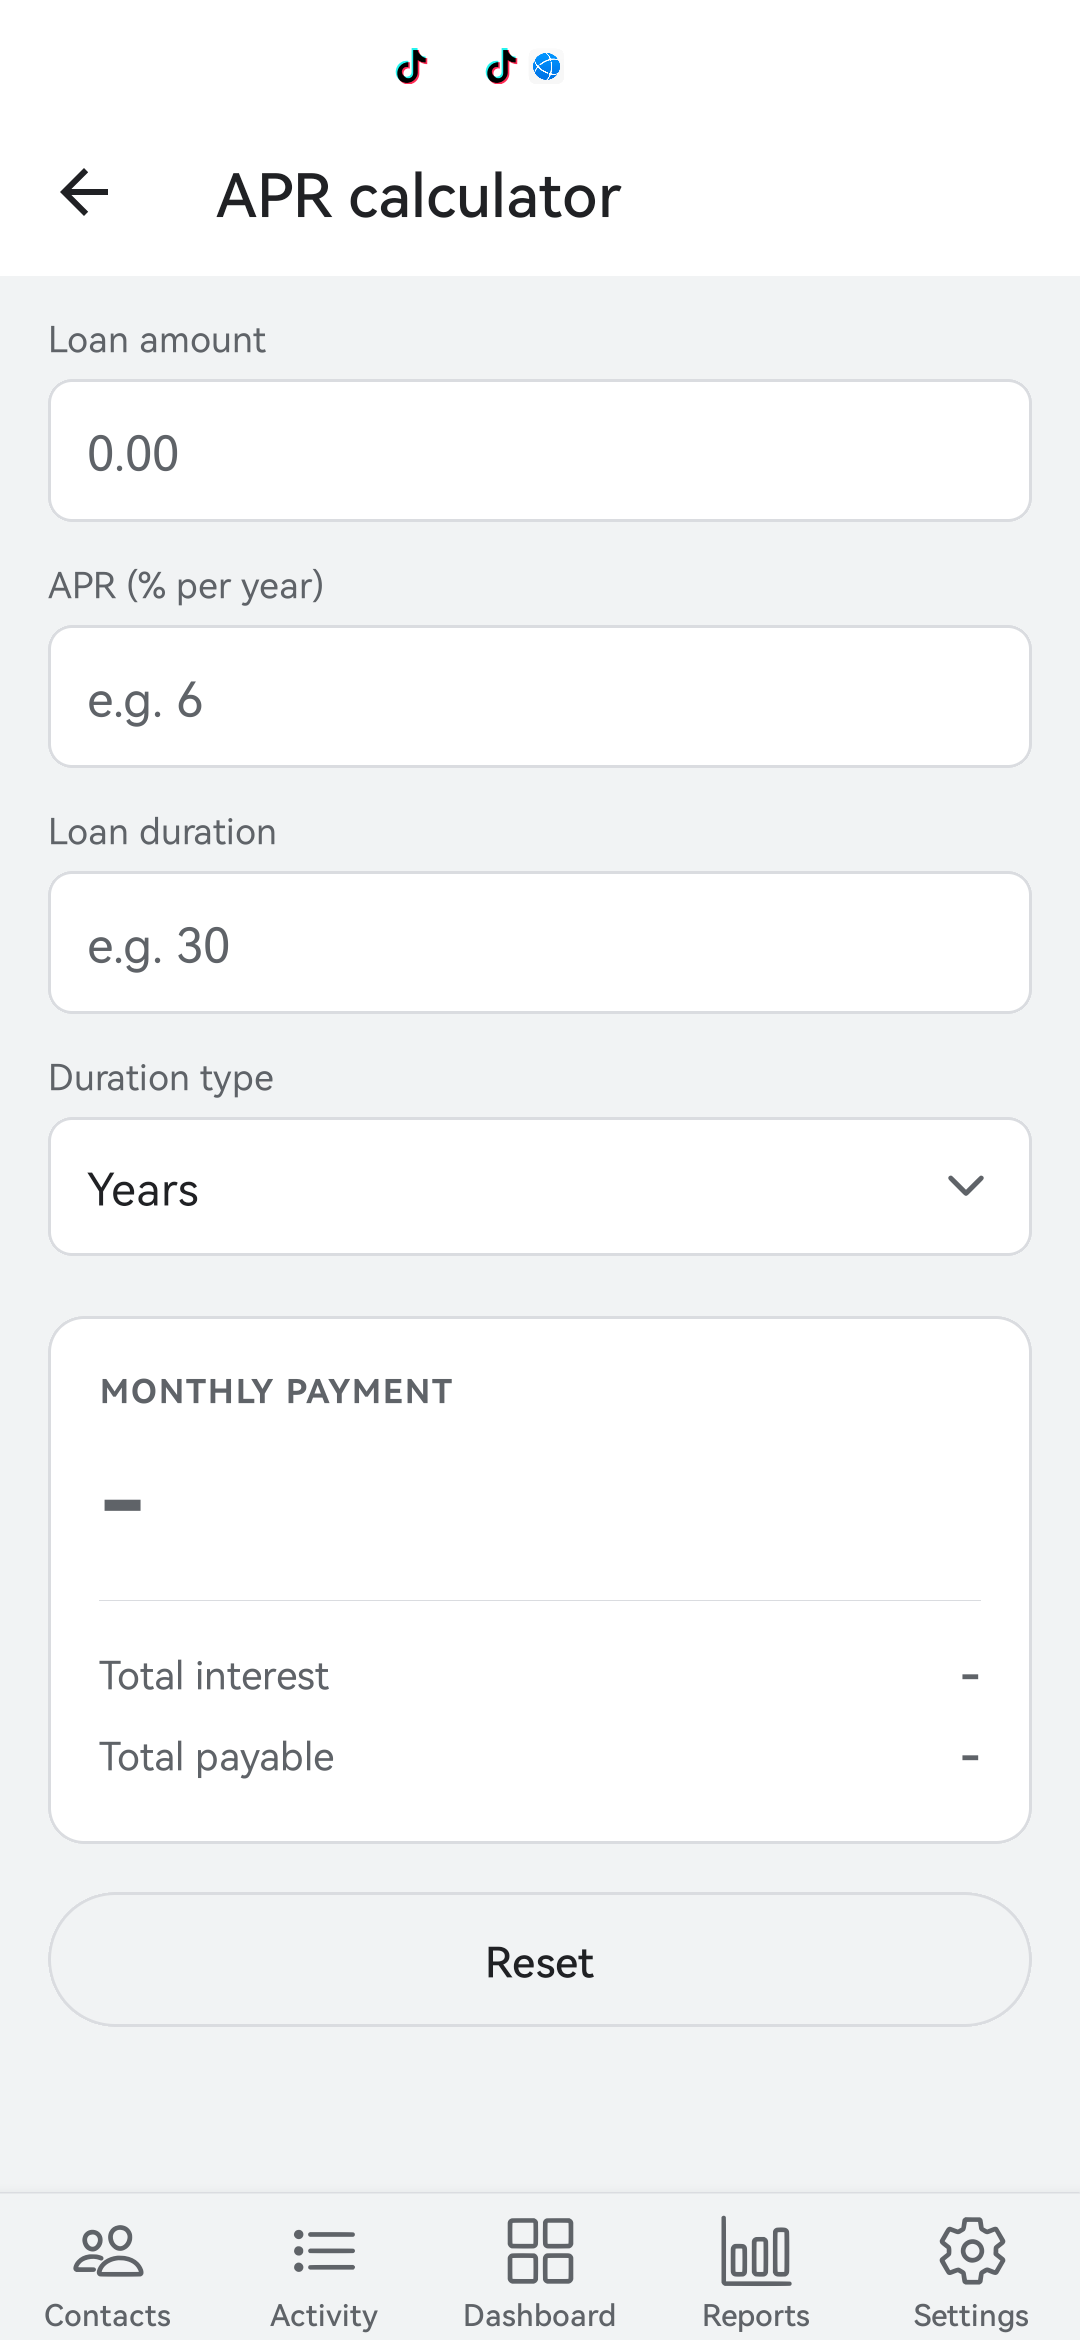
APR Calculator
Type the loan amount, the APR percent per year, and the duration (in years or months). The calculator returns your monthly payment, total interest, and total payable. Useful for comparing two loan offers.
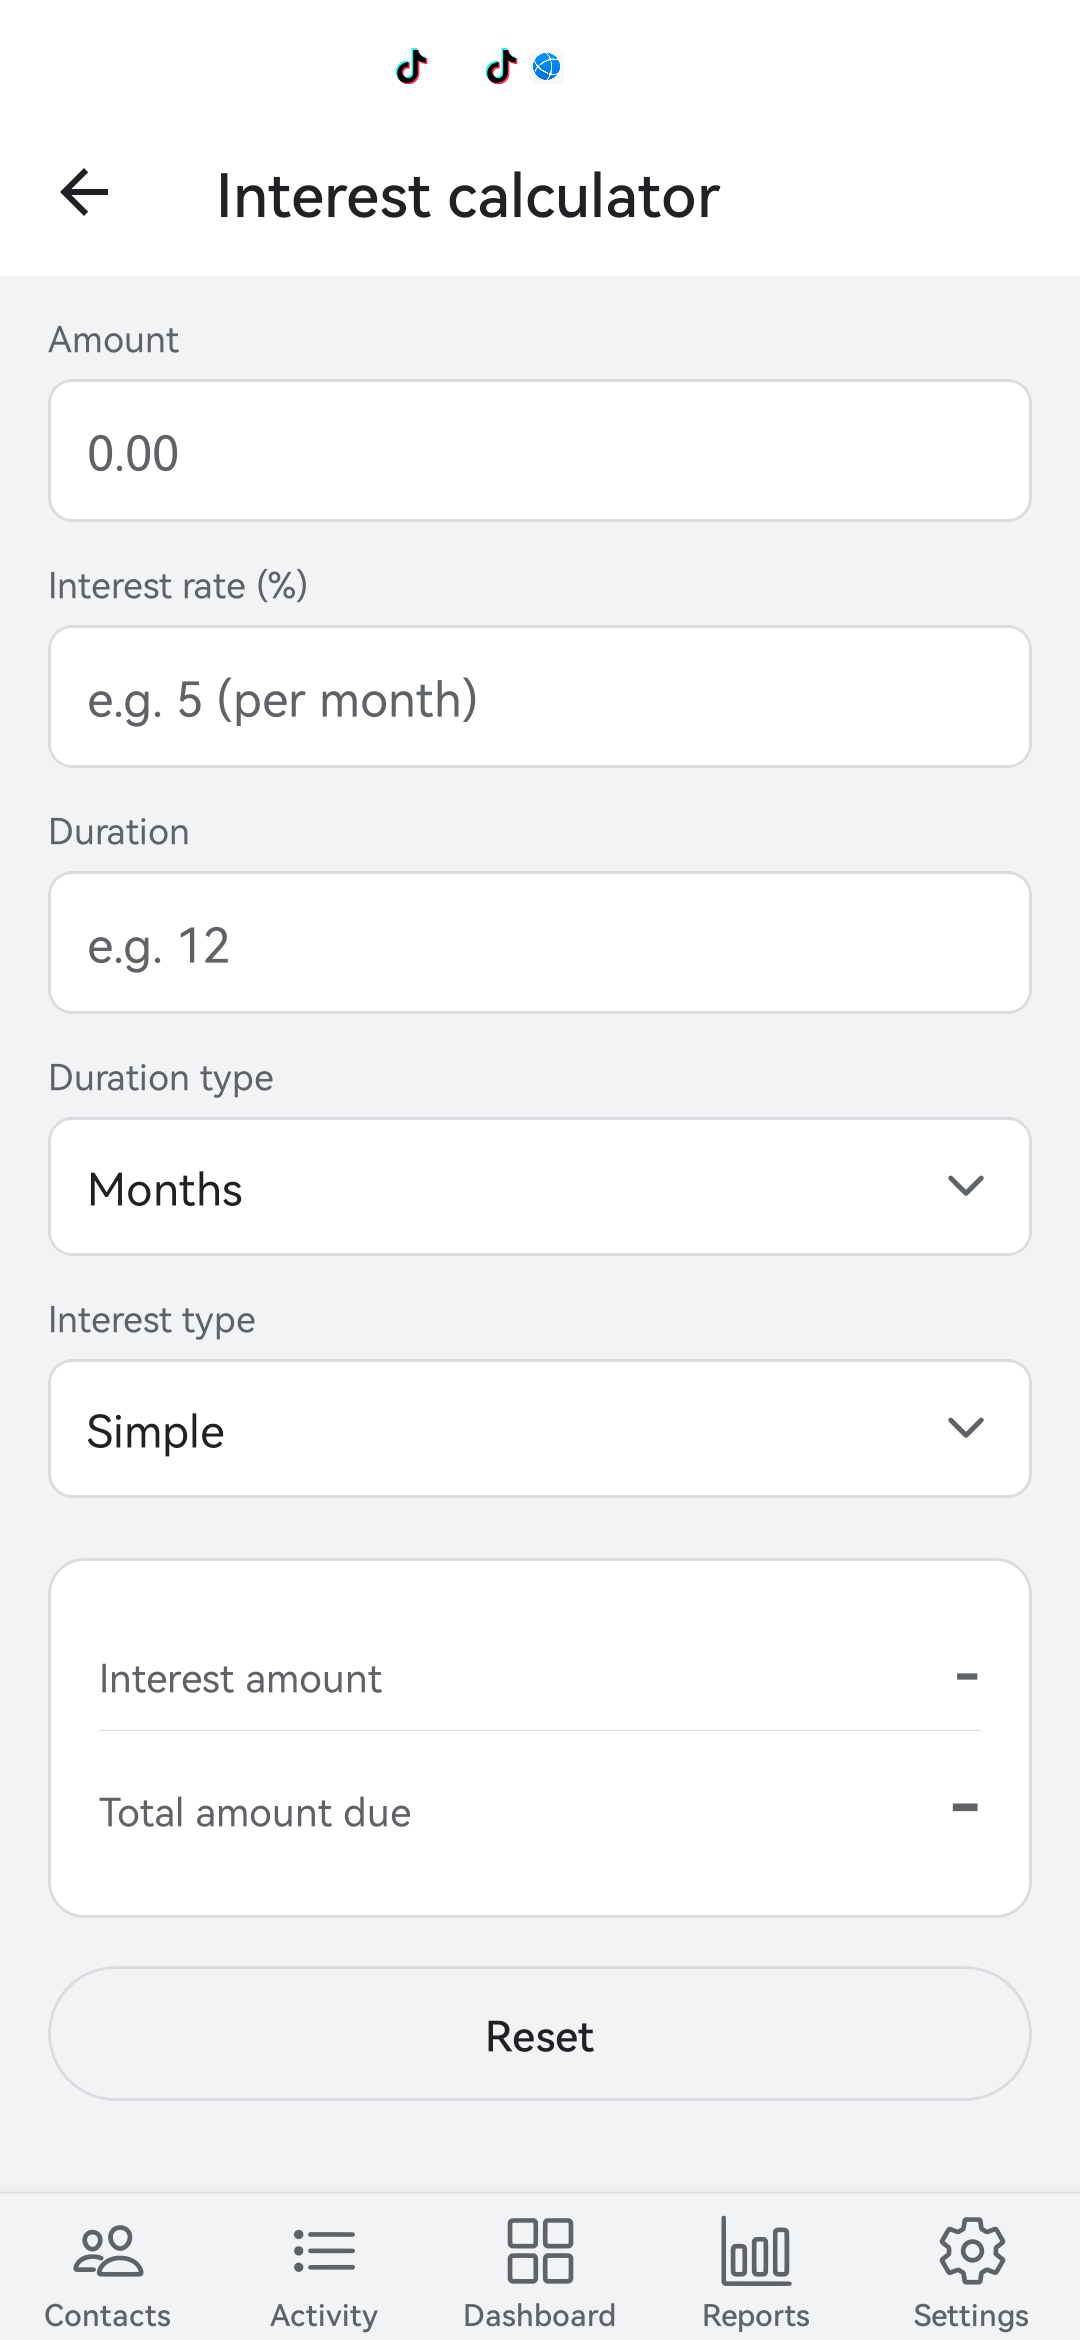
Interest Calculator
Simple or compounding interest over months or years. Type the principal, the rate, and the duration. The calculator does the rest.
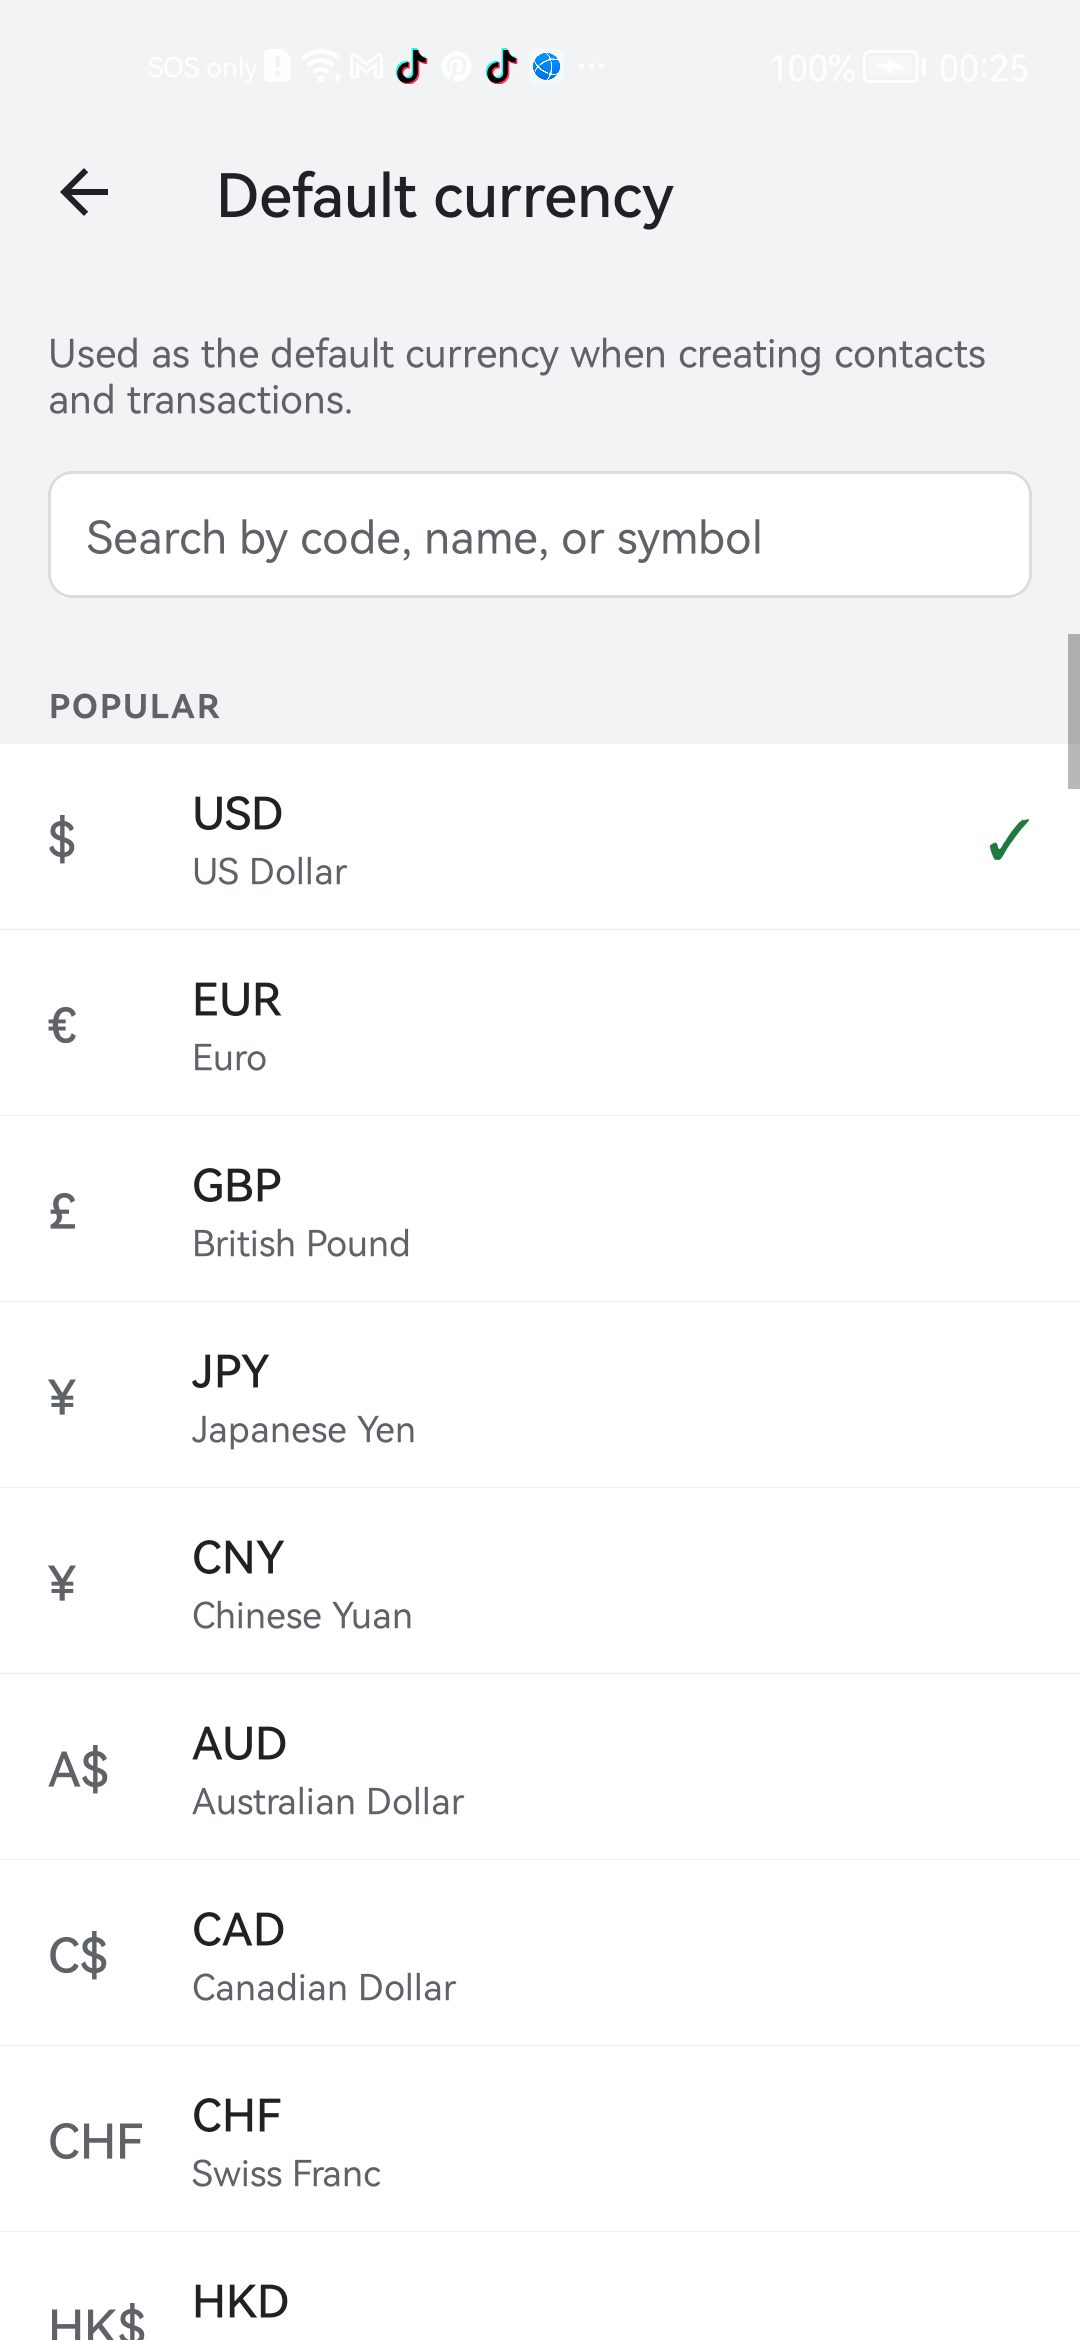
11. Change your currency
Bexbox uses US dollars (USD) by default. If you want a different currency for everything you log, change it once in Settings and the whole app updates.
- Tap the Settings tab.
- Tap Default currency.
- The picker has every ISO 4217 currency. Type a code like USD, PHP, EUR, GBP, or a name like Philippines.
- Tap your choice. The whole app rebuilds with the new currency symbol.
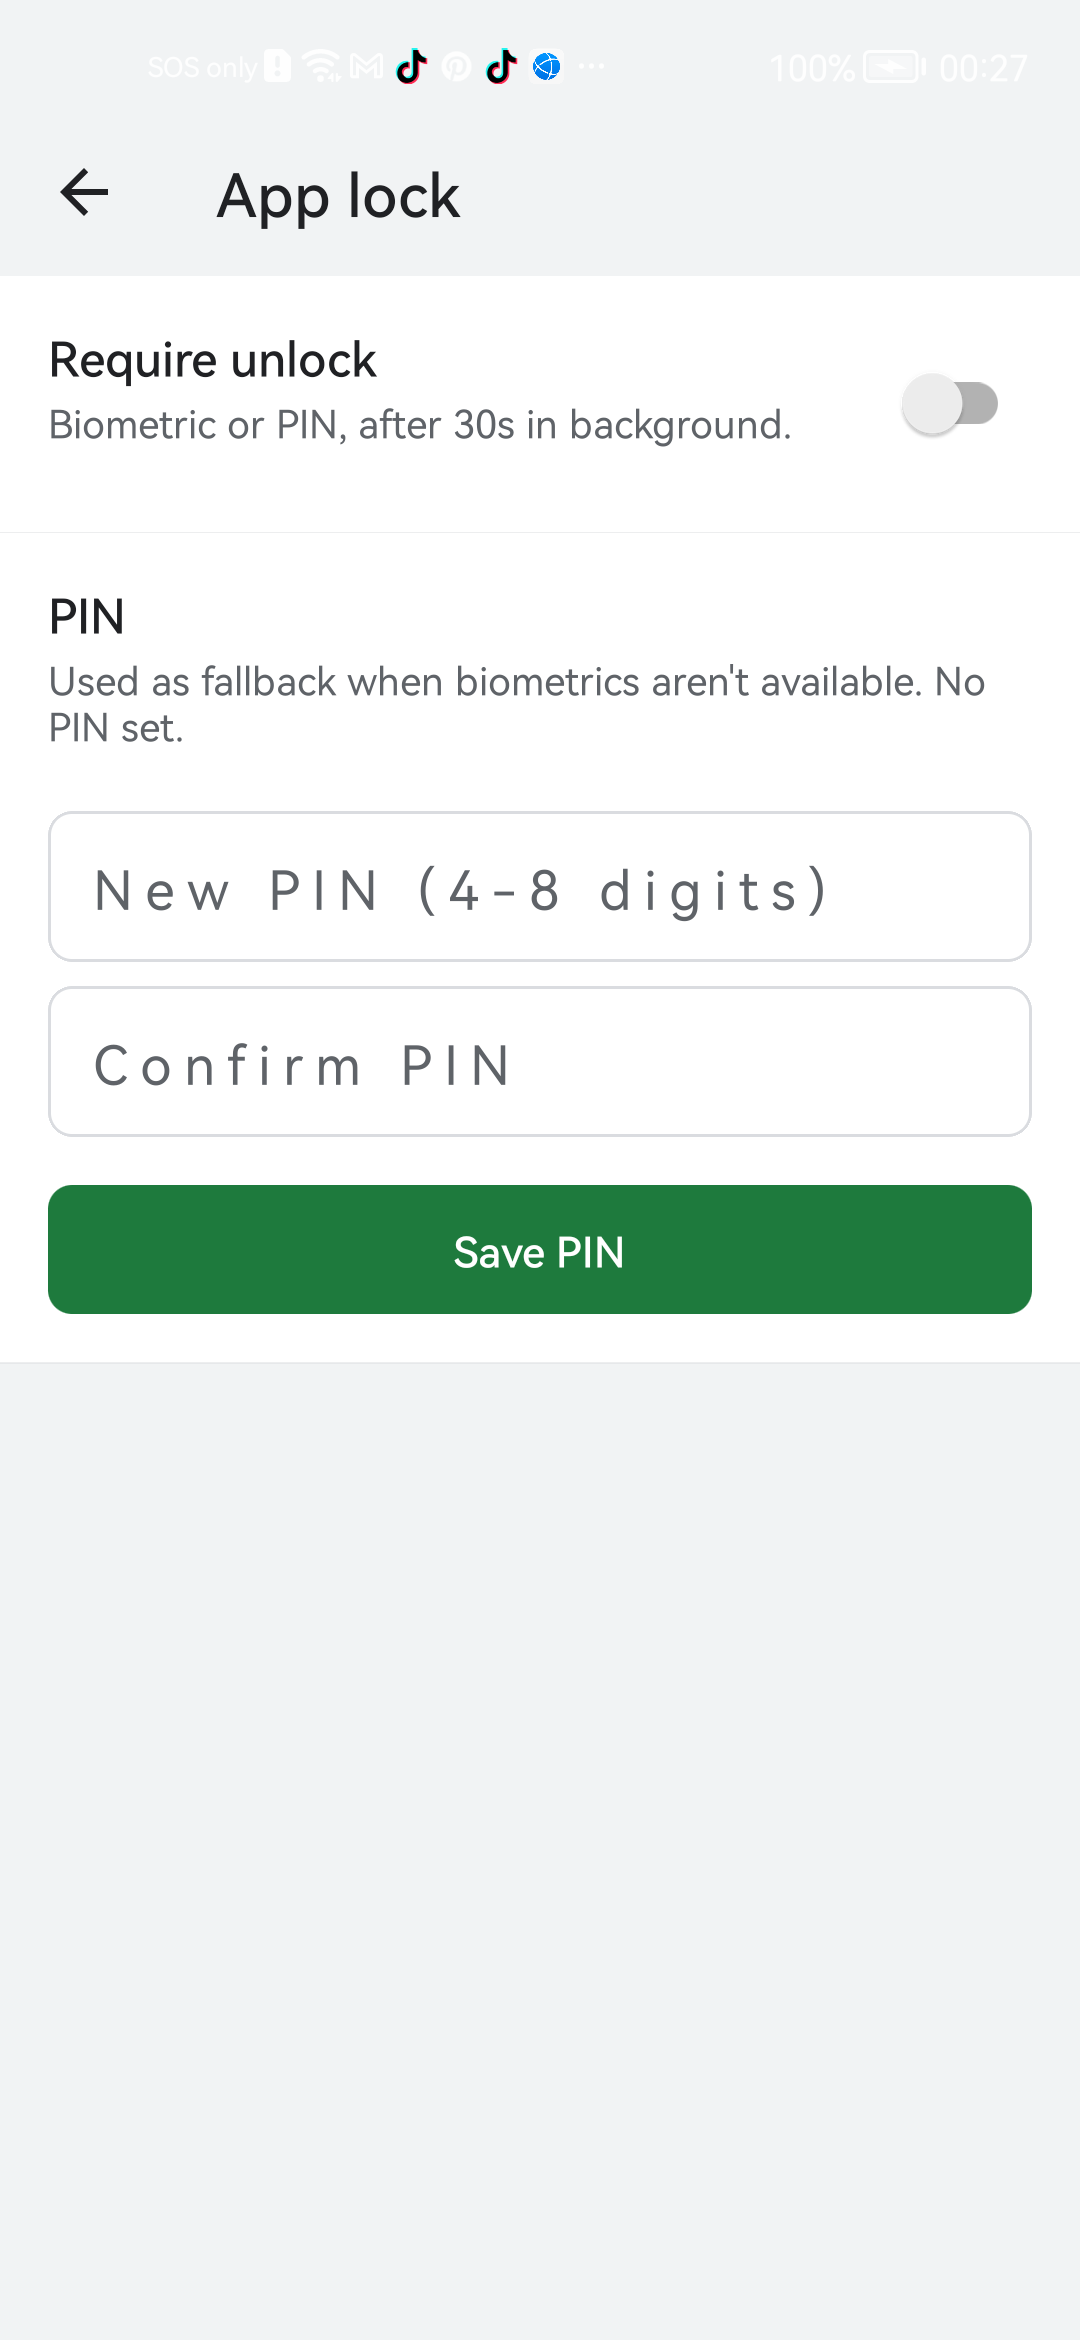
12. Lock the app with PIN or fingerprint
Anyone who picks up your phone could open Bexbox. To stop that, turn on App Lock.
- Tap Settings.
- Tap App lock.
- Turn on Require unlock. Bexbox will use whichever biometric is already on your phone (fingerprint or face).
- Set a 4 to 8 digit PIN as fallback for when biometrics are not available.
- From now on, Bexbox will ask before showing anything after 30 seconds in the background.
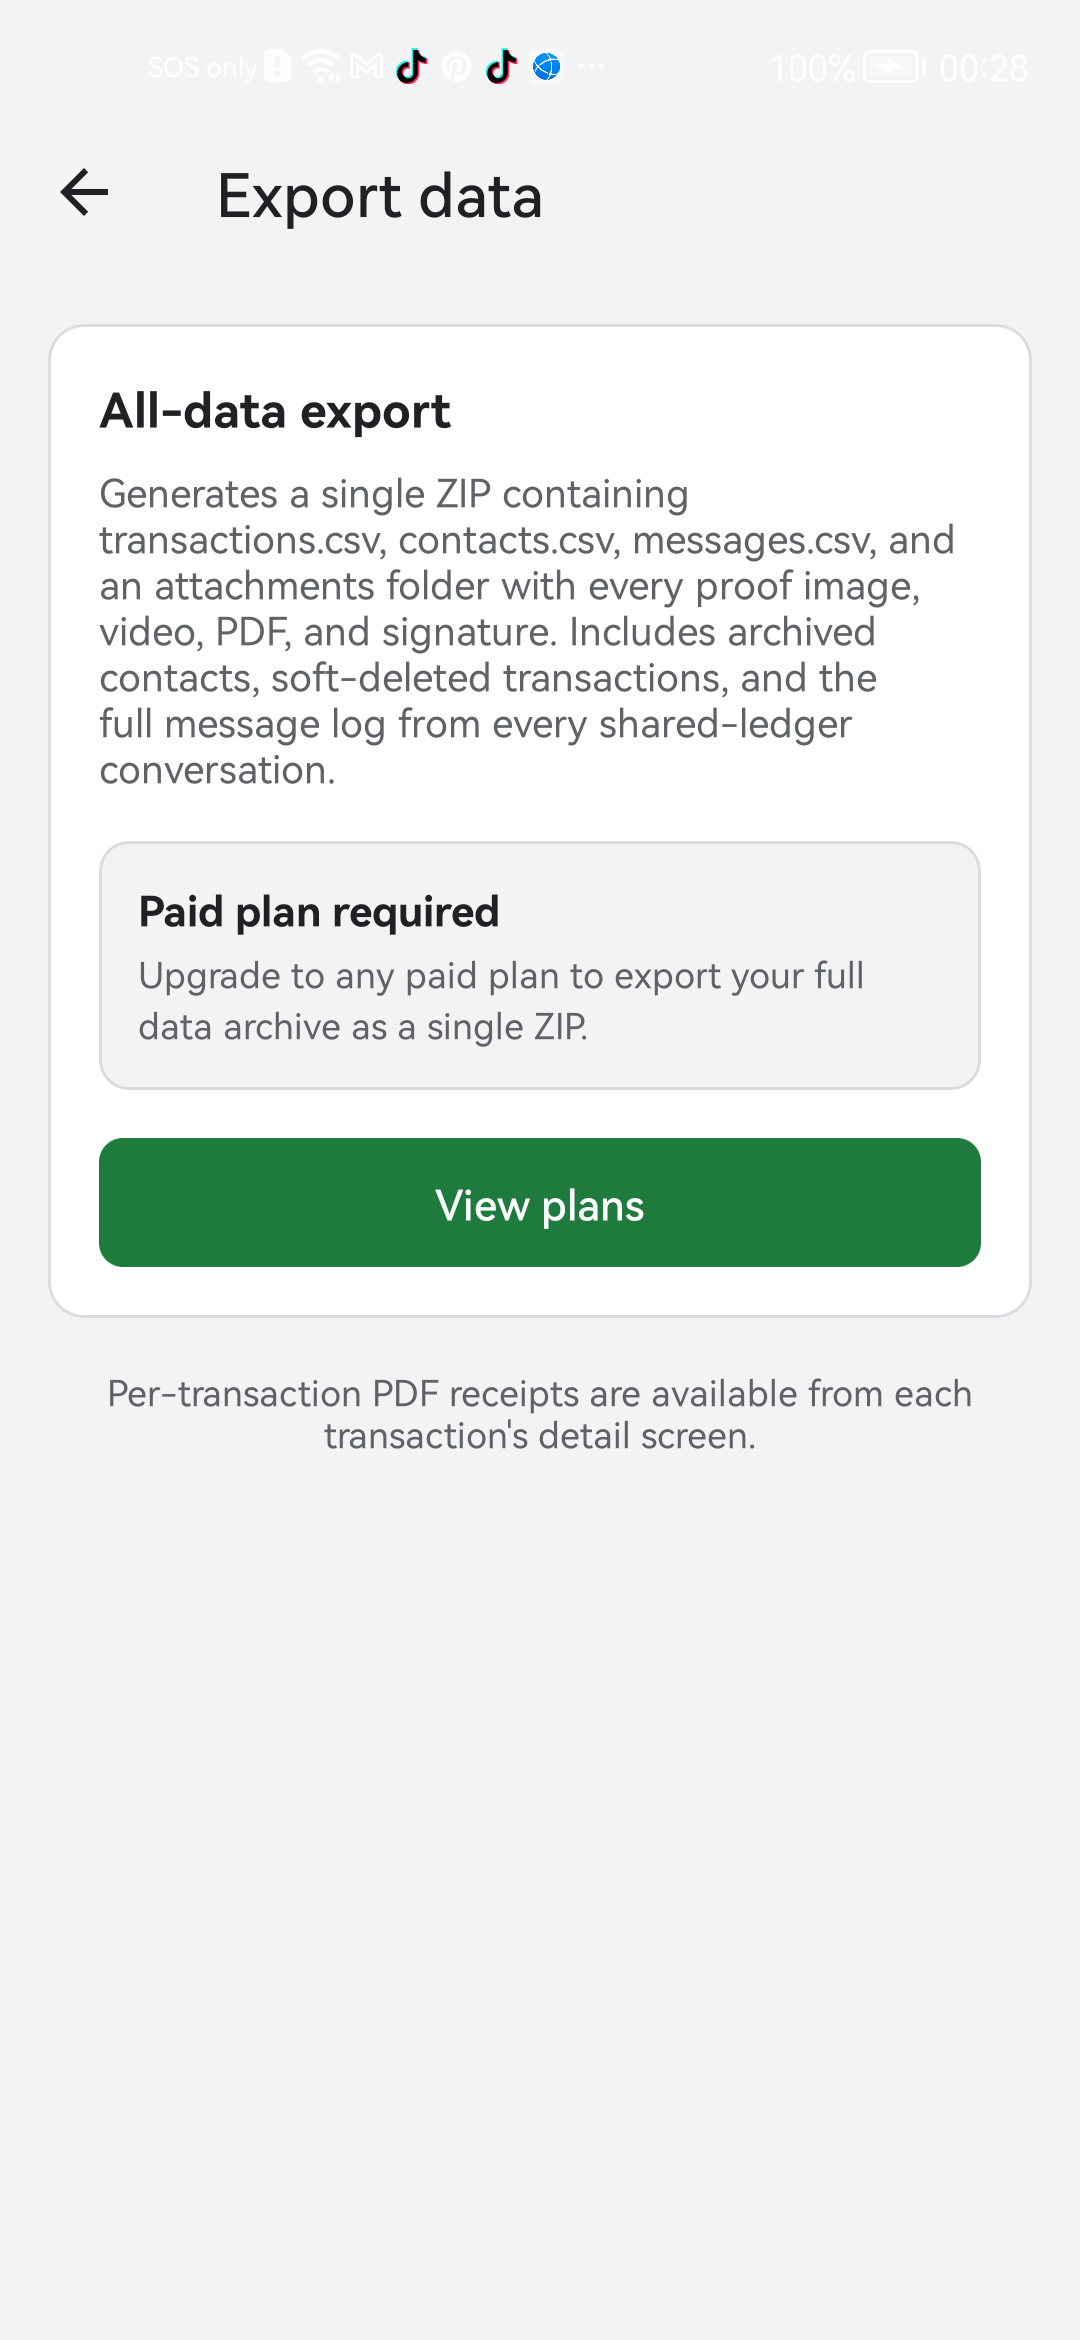
13. Back up and export your data
You can take everything out of Bexbox any time. There is no lock-in.
Export everything as a ZIP
- Tap Settings.
- Tap Export your data.
- Bexbox builds a ZIP with transactions.csv, contacts.csv, and an attachments folder with every proof image, video, PDF, and signature. Soft-deleted transactions are included so the audit trail is complete.
- Pick where to save it: Google Drive, your phone storage, email, anywhere.
Export one transaction as a PDF receipt
- Open the transaction.
- Tap the menu (three dots), then Export PDF.
- You get a one-page PDF with the date, amount, parties, category, and any signature.
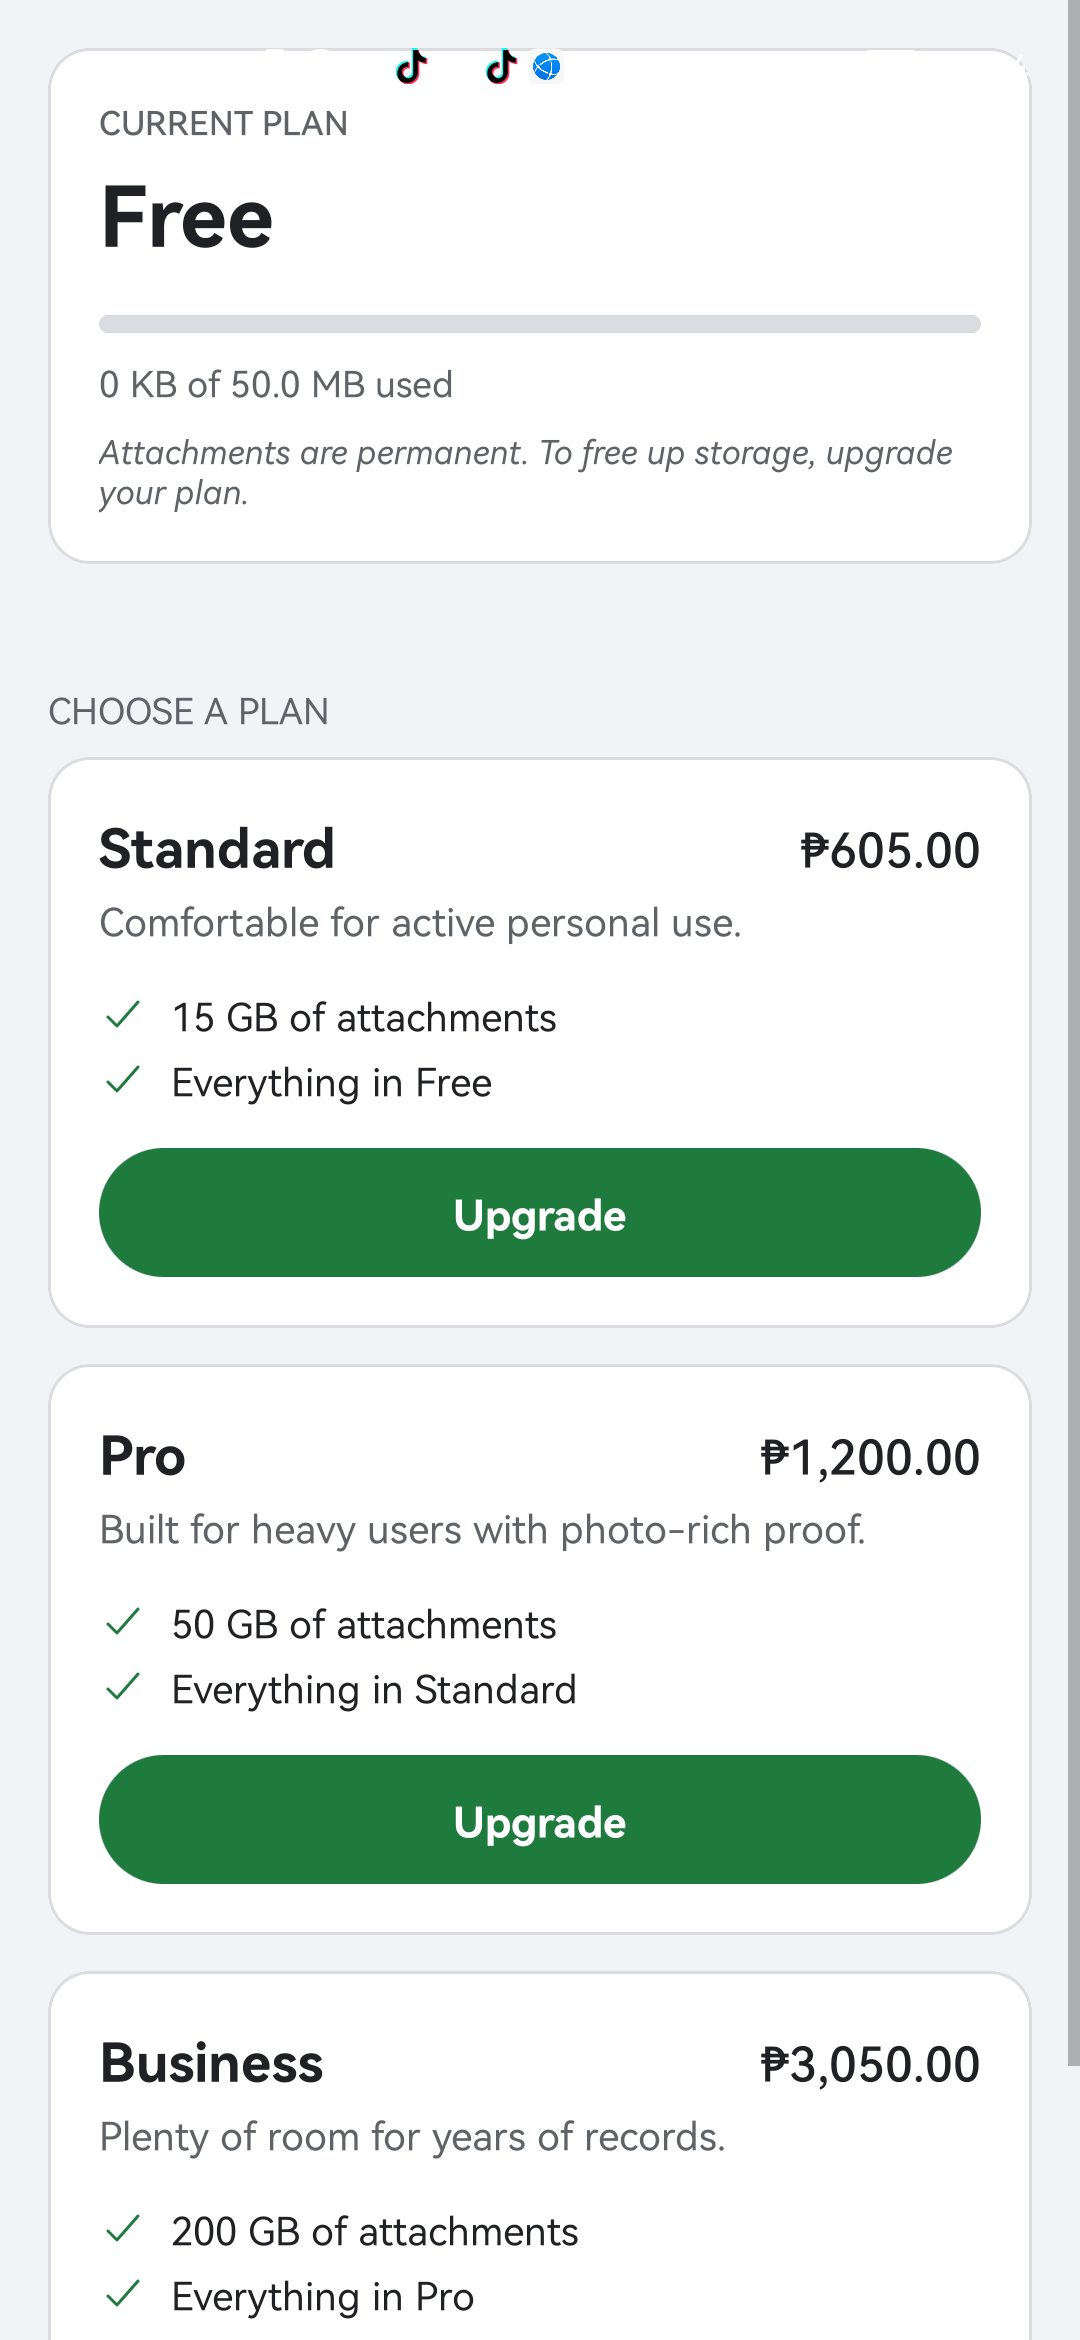
14. Upgrade your storage
The Free tier gives you a small amount of cloud storage for your attachments. That is plenty for a few hundred receipts. If you start attaching many photos or larger files, you can upgrade any time.
- Tap Settings.
- Tap Plan & storage. You will see a bar showing how full your storage is.
- Tap Upgrade.
- Pick a tier:
- Standard: $9.99 / month.
- Pro: $19.99 / month.
- Business: $49.99 / month.
- The purchase happens through the Google Play Store. You can cancel any time from Play Store > Subscriptions.
15. Delete your account
If you decide Bexbox is not for you, you can delete your account completely from inside the app. Nothing is left behind on our side.
- Tap Settings.
- Scroll down and tap Delete your account.
- Confirm. Bexbox warns you this cannot be undone.
- Within seconds: every contact, every transaction, every attachment, your profile, all gone.
16. Get help
If you get stuck or find something confusing, the fastest way to reach us is email:
We usually reply within a working day. Include your phone model and a short description of what you were trying to do.
Looking for the legal side instead? See the Privacy Policy or the Terms of Service.